Build, Test & Debug GitHub Copilot MCP Apps
Learn to build, test, and debug GitHub Copilot MCP Apps locally with MCPJam. Render UIs, trace JSON-RPC messages, test tools, and verify in VS Code.
In this guide7 sectionsHide
Building an MCP App for GitHub Copilot can be difficult when you can't see what's happening between your UI, your MCP server, and Copilot. Copilot Chat renders the app's UI inline, under the tool call that returned it, but testing it there is slow. Every change costs a chat turn, the model may pick different arguments each time, and the chat shows the tool call but not the JSON-RPC messages behind it: the handshake when your UI connects, the tool result Copilot delivers to it, and the calls your UI makes back to your server.
With MCPJam, you can render the UI in an emulated Copilot client, replay tool calls with fixed inputs, and trace those messages on your machine before you open Copilot at all:
- Part 1: Run the task board from the Claude tutorial, which works in Copilot unchanged, and adjust its descriptions so Copilot doesn't route task requests to its built-in
#todostool. - Part 2: Test and debug it with MCPJam's Copilot client: rendering, the app bridge, CSP, message tracing, fixed-input tool calls, model testing, and a final check in GitHub Copilot.
This guide is part of a series on building MCP Apps for different clients. If you're also targeting Claude or ChatGPT, the Claude tutorial and the ChatGPT tutorial cover the same task board so you can compare the approaches.
You can find the complete code on GitHub.
How a GitHub Copilot MCP App fits together
GitHub Copilot supports the open MCP Apps standard, so a tool can return an interactive UI that renders inline in chat instead of as plain text. Copilot calls MCP tools in agent mode, the mode where it can use tools on its own. The Copilot client renders apps inline by default and allows fullscreen on desktop.
A tool returns data, a ui:// resource serves the HTML, and _meta.ui.resourceUri links the two. Copilot renders the HTML in a sandboxed iframe, and the UI talks to Copilot over a JSON-RPC bridge. For the check in a real client (step 9), we'll use the GitHub Copilot Chat extension in VS Code, which connects to a local server directly.
The MCP Apps SDK wraps each protocol message in a helper, so you don't have to write the messages by hand. Copilot supports most of them, with a few differences in behavior. The last column shows the names ChatGPT accepts if you're porting a ChatGPT App:
Swipe to see all columns →
| MCP Apps standard | Goal | SDK helper | Copilot behavior | ChatGPT alias |
|---|---|---|---|---|
_meta.ui.resourceUri | Link a tool to a UI resource | registerAppTool() | Supported | _meta["openai/outputTemplate"] |
ui/initialize + ui/notifications/tool-input | Receive tool input | app.ontoolinput | Supported, including partial input while the model streams it | window.openai.toolInput |
ui/notifications/tool-result | Receive tool results | app.ontoolresult | Supported | window.openai.toolOutput |
tools/call | Call a tool from the UI | app.callServerTool() | Supported | window.openai.callTool |
ui/message | Send a follow-up message | app.sendMessage() | Fills the chat input but doesn't send it | window.openai.sendFollowUpMessage |
ui/update-model-context | Add context for later turns | app.updateModelContext() | Shows up as a chat attachment | — |
ui/request-display-mode | Change display mode | app.requestDisplayMode() | Inline only; MCPJam's Copilot client also lists fullscreen | — |
ui/notifications/host-context-changed | Follow theme changes | app.onhostcontextchanged | Supported | — |
| Handle a cancelled tool call | app.ontoolcancelled | Supported | — | |
| Send debug logs | app.sendLog() | Supported | — |
Our task board's UI talks to Copilot only through SDK helpers, so the same UI bundle can also render in other clients that support MCP Apps.
Part 1: Set up the task board
The task board from the Claude tutorial runs in Copilot as is. Both clients implement the MCP Apps standard, so there's no Copilot-specific code to write.
The server, task-board, keeps three tasks in memory and listens at http://127.0.0.1:3000/mcp. It splits its tools the way the Claude tutorial explains:
- Two data tools.
list_tasksreturns the tasks, optionally filtered bystatus, andcomplete_taskmarks one done bytaskId. Neither has a UI, so a data call never re-renders the board. Both repeat the tasks incontentas JSON text, so the model has IDs and titles to pass toshow_task_boardeven in a client that doesn't give itstructuredContent. - One render tool.
show_task_boardis the only tool linked to the UI resource,ui://task-board/v1.html. It renders the tasks it receives as a React board, with a Done button on each row that callscomplete_task.
This part gets that code running and makes the one change Copilot calls for: telling your tools apart from Copilot's own.
Before you start
Make sure you have:
- Node.js 22+ (
node --version). Both the app and MCPJam run on it. - npm, which ships with Node.
- Optional: VS Code with the GitHub Copilot Chat extension, if you want to confirm the app in Copilot (step 9).
MCPJam doesn't need a GitHub account. For the check in Copilot, any Copilot plan works, but on Business and Enterprise an admin has to turn on the MCP servers in Copilot policy first.
1. Get the task board running
Copy the Claude version, build the UI, and start the server:
Scroll code horizontally →
git clone https://github.com/MCPJam/tutorials.git
cp -r tutorials/task-board-claude task-board

cd task-board/web && npm install && npm run build
cd ../server && npm install && npm start
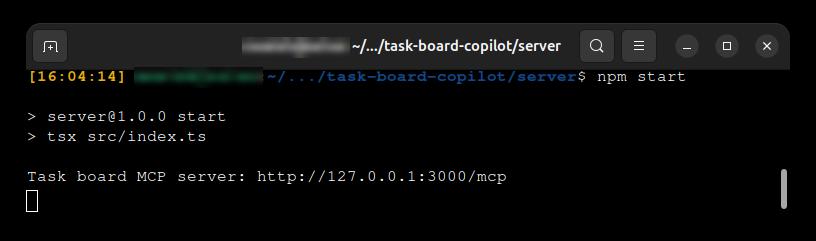
You should see Task board MCP server: http://127.0.0.1:3000/mcp in the terminal.
2. Tell the model what the board is for
The Claude version never says what kind of tasks the board holds. That works when the board's tools are the only task tools the model sees. Copilot's agent mode adds its own #todos tool, listed in Copilot's tools reference, for tracking the agent's progress through a request. So "Show me my open tasks" could reasonably go to either list_tasks or #todos. In server/src/server.ts, add what the board holds to the server instructions:
Scroll code horizontally →
       instructions:
-        "Call list_tasks to get tasks. To show tasks visually, call list_tasks first, then pass its tasks to show_task_board.",

+        "The task board holds the user's project tasks. Call list_tasks to get them. To show tasks visually, call list_tasks first, then pass its tasks to show_task_board.",
Then to the list_tasks description:
Scroll code horizontally →
       description:
-        "Use this when the user wants to find or review their tasks. Returns tasks with id, title, and done status.",

+        "Use this when the user wants to find or review tasks on their task board. Returns tasks with id, title, and done status. Not for the agent's own todo list.",
And to the complete_task description:
Scroll code horizontally →
-      description: "Use this when the user wants to mark a task as done.",

+      description: "Use this when the user wants to mark a task on their task board as done.",
Stop the server and run npm start again so it serves the updated descriptions.
Copilot supports server instructions, so the model sees them along with your tool descriptions. Copilot also shows the descriptions to the user, in the tools picker and in the confirmation dialog.
The annotations don't change, but Copilot uses two of them to decide what the user sees. It shows title in the Chat view when the tool runs, and it runs a tool marked readOnlyHint: true without asking. Every other tool gets a confirmation dialog first, where the user can also edit the arguments the model chose. So list_tasks and show_task_board run without a prompt, and complete_task shows the user the task ID to approve.
Part 2: Test and debug with MCPJam
MCPJam Inspector is an open-source dev tool for MCP servers and MCP Apps. It renders your UI the way a real client would, lets you select Copilot as the client, and shows the JSON-RPC traffic that the chat hides.
You'll start by calling the tools directly, without a model. Then you'll check which tools a model picks, and finish with a check in GitHub Copilot.
3. Launch MCPJam and connect
Leave the server running. In a new terminal do:
npx @mcpjam/inspector@latest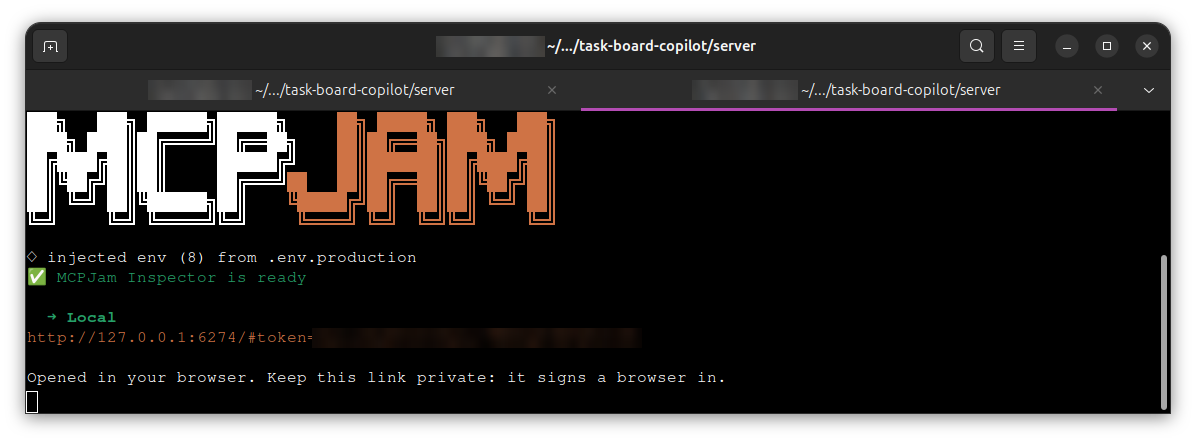
MCPJam requires Node.js 22+. If you'd rather not use the terminal, install the desktop app or run MCPJam from Docker.
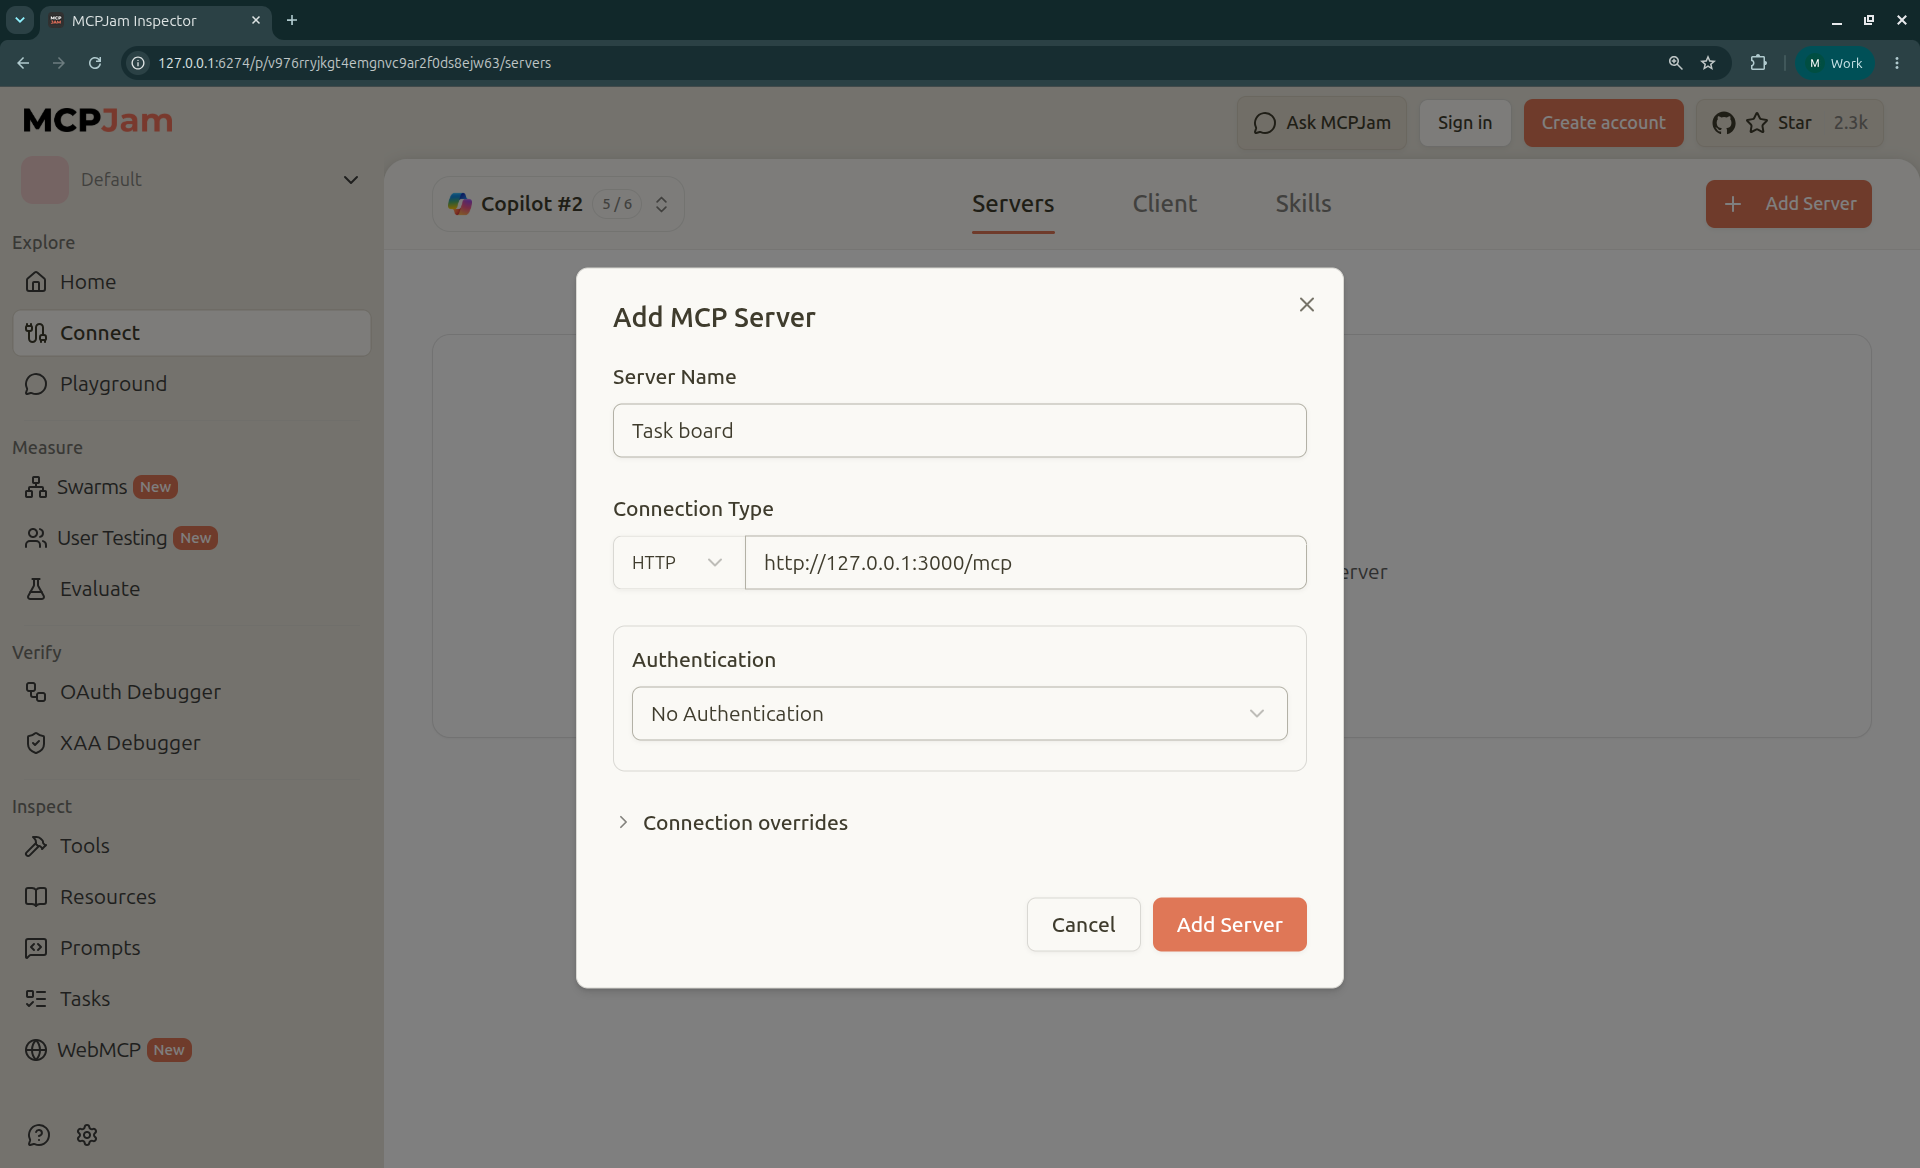
In the Servers tab, add an HTTP server at http://127.0.0.1:3000/mcp.
Swipe to inspect the full diagram →
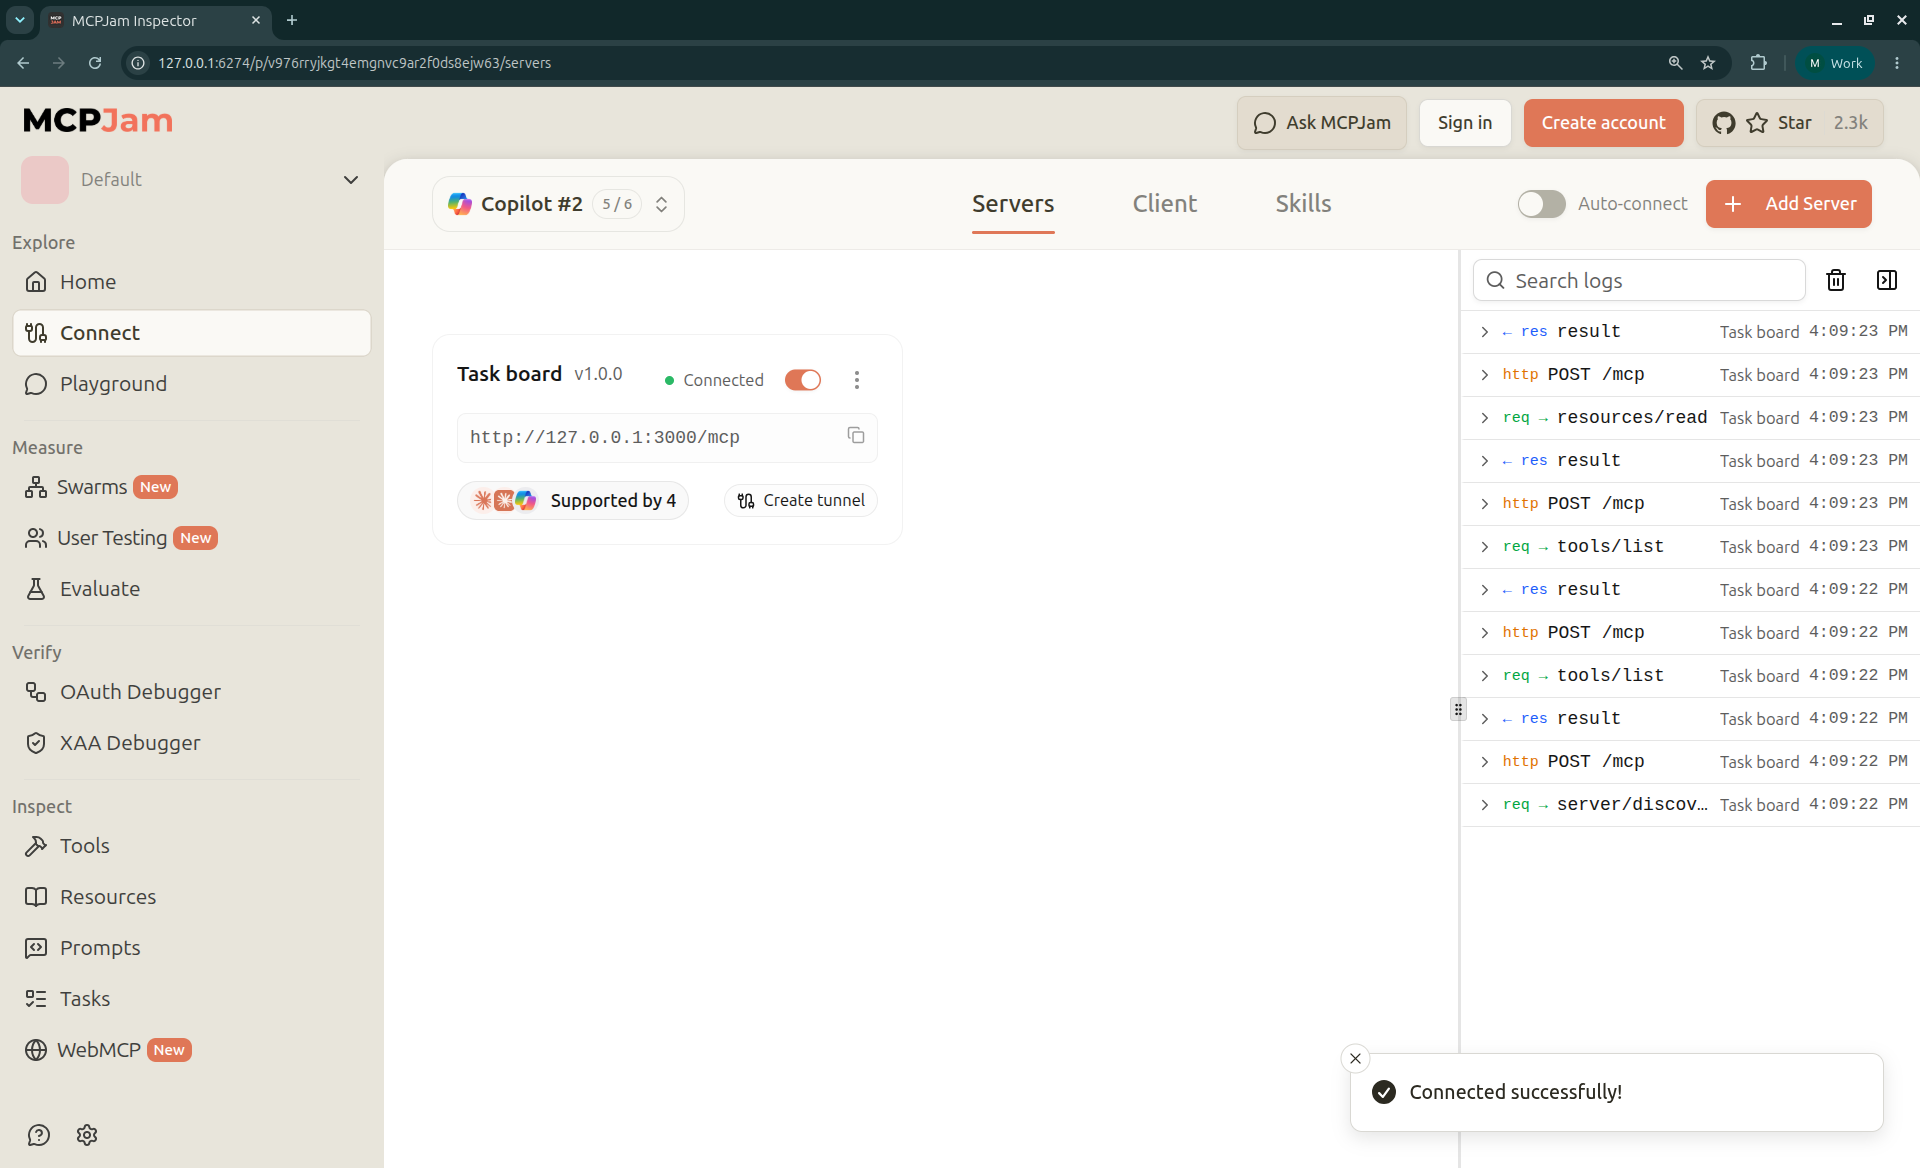
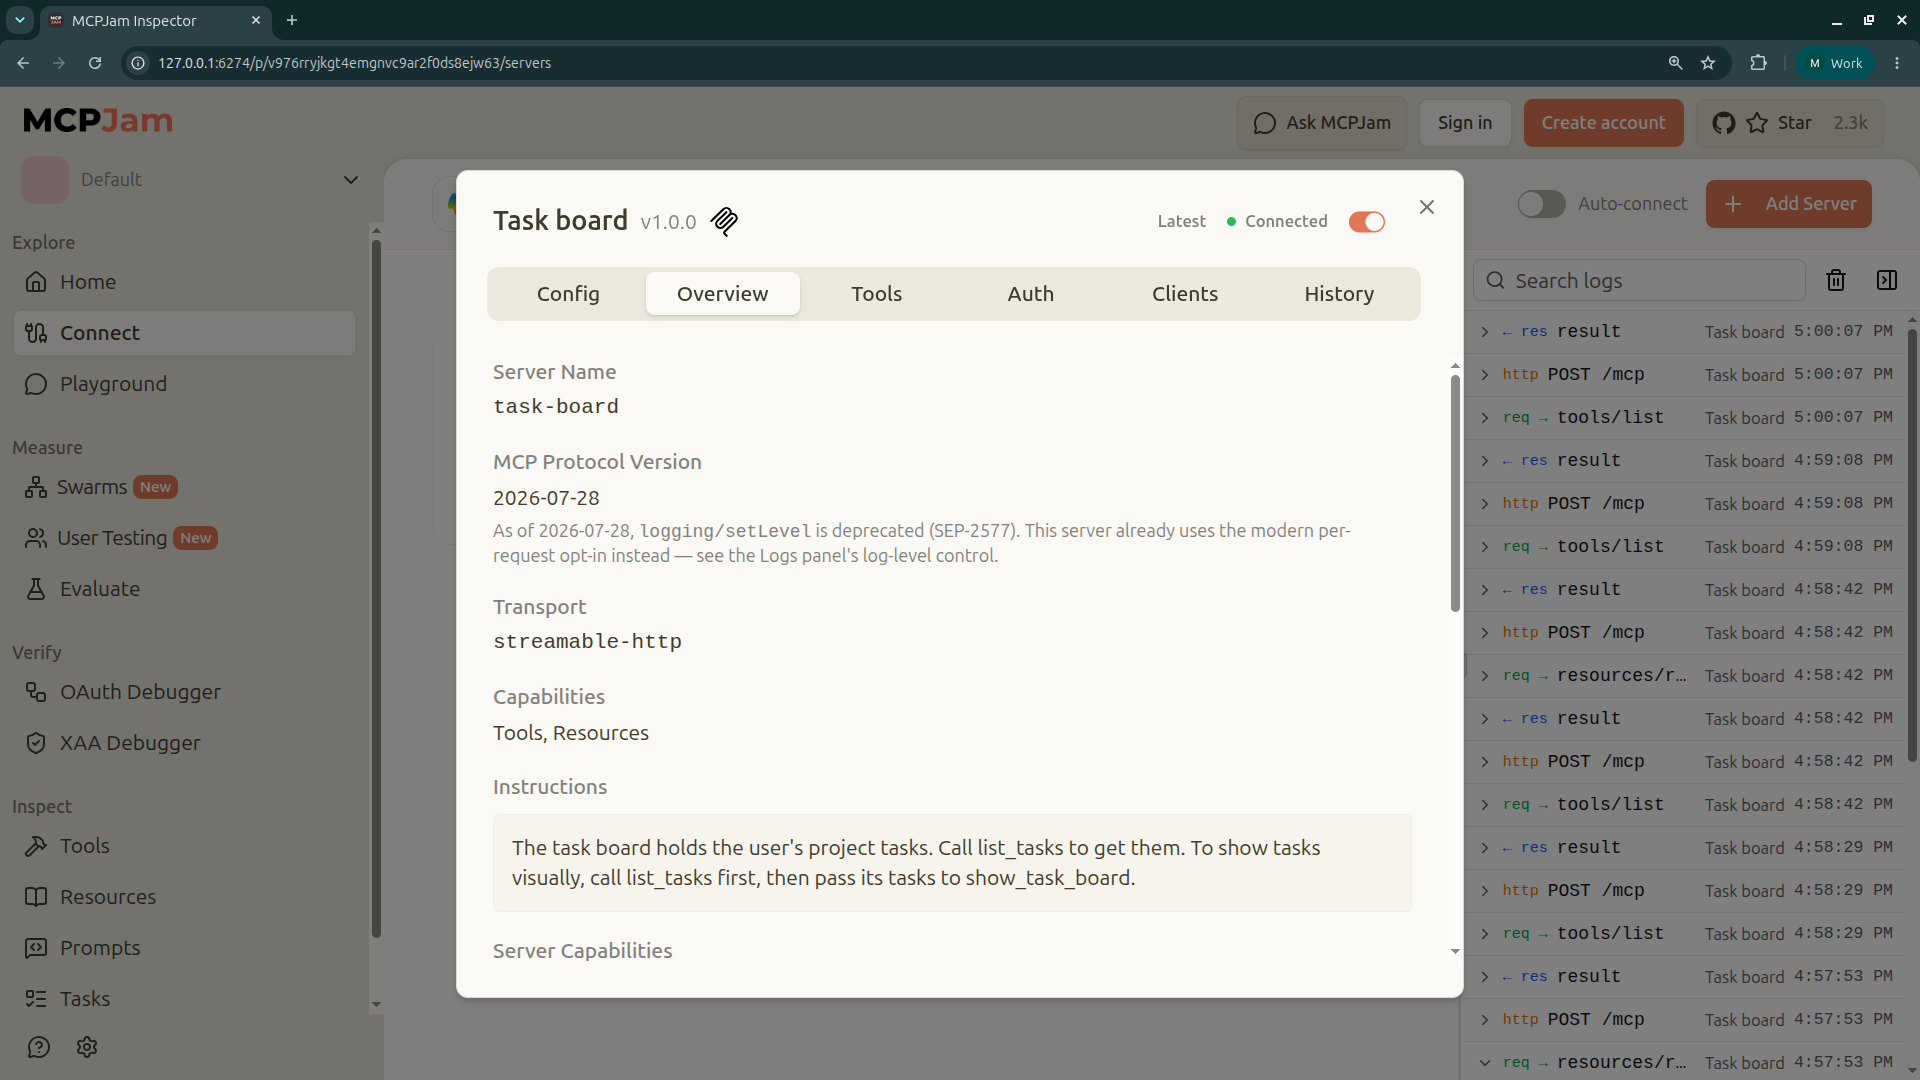
You should see three things in the server info view:
- The server initialized.
- Your
instructionsfrom step 2, shown verbatim. - All three tools listed with the schemas and annotations you wrote.
Swipe to inspect the full diagram →
Swipe to inspect the full diagram →
Swipe to inspect the full diagram →
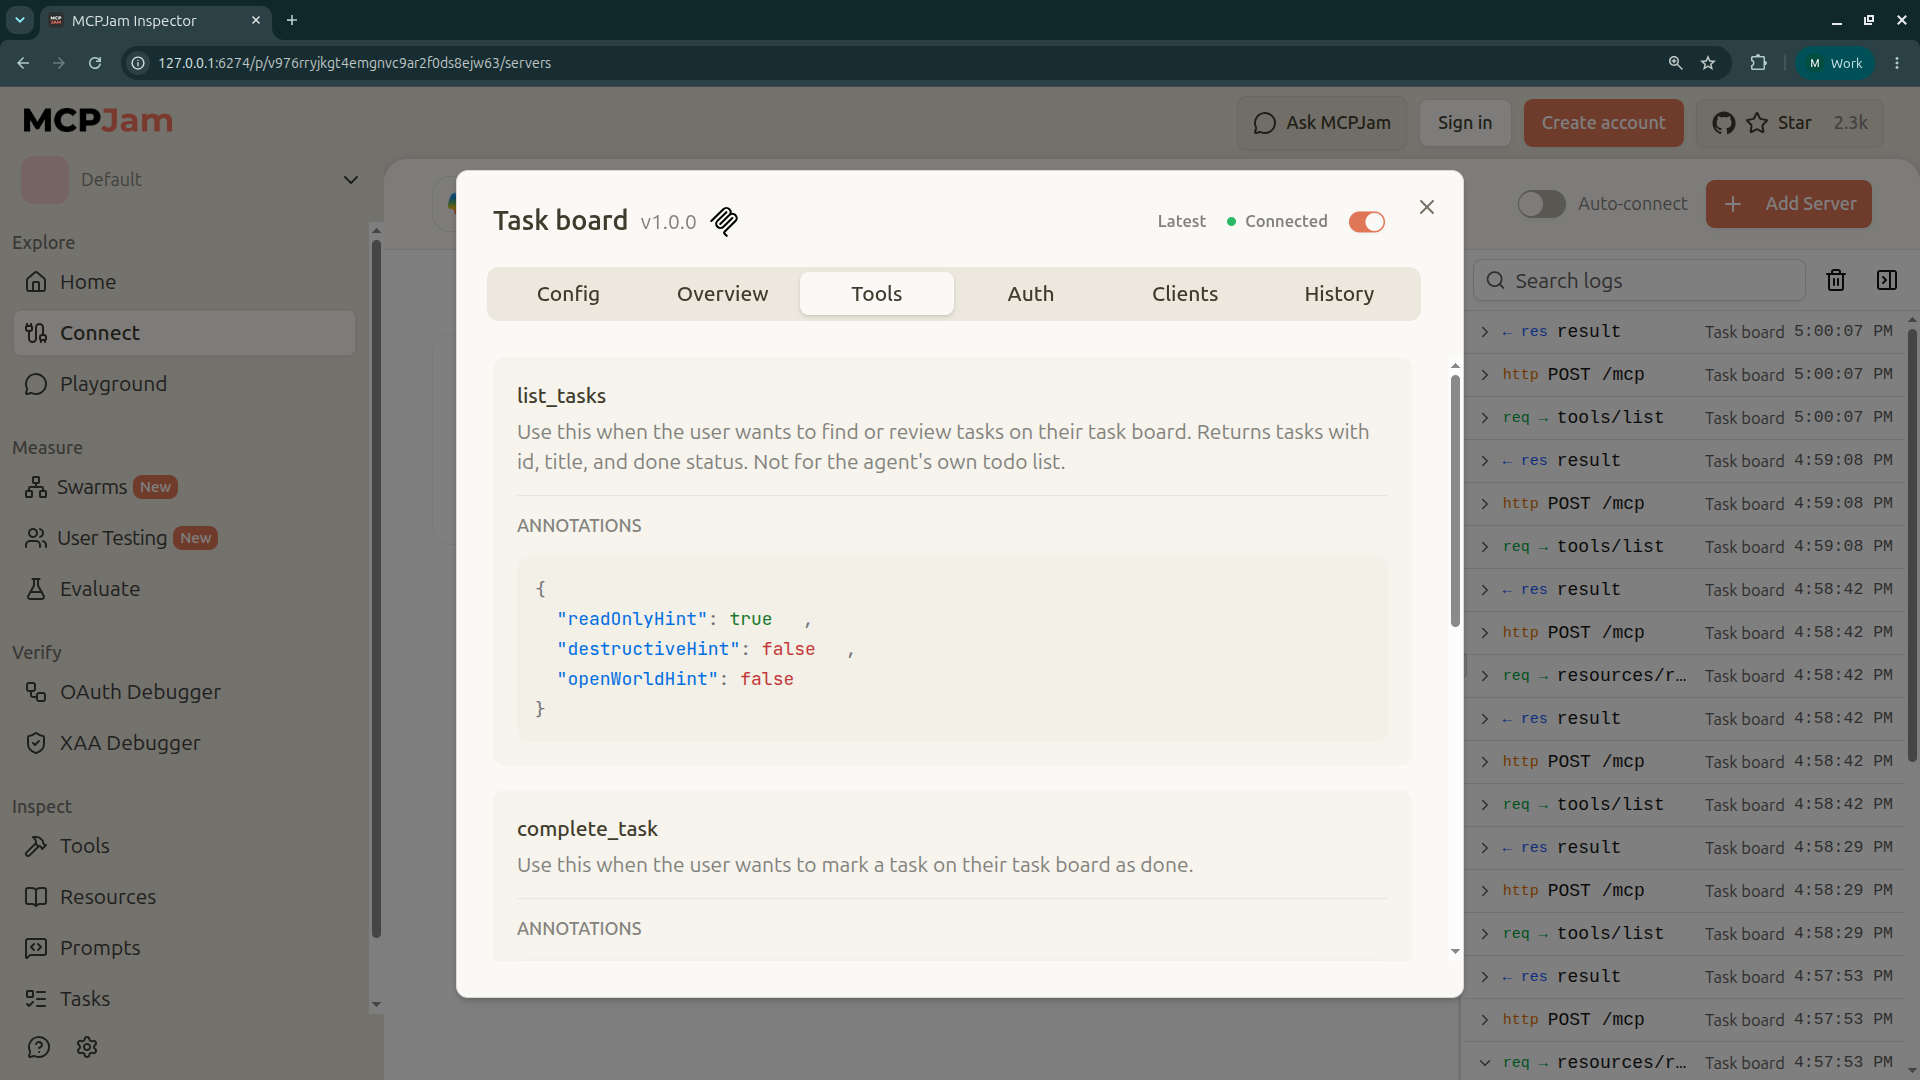
If you don't, a connection error almost always means the server isn't running or is on a different port. Missing tools mean their registerTool calls never ran, so check createServer().
4. Render the UI
Go to Playground, select Copilot as the client, open the Tools tab, and invoke show_task_board manually. The tool's inputSchema is { tasks: z.array(TaskSchema) }, so the input is an object with a tasks key, not a bare array:
Scroll code horizontally →
{
  "tasks": [
    { "id": "t1", "title": "Write the launch post", "done": false },
    { "id": "t2", "title": "Review the pricing page", "done": false },
    { "id": "t3", "title": "Book the team offsite", "done": true }
  ]
}
Swipe to inspect the full diagram →
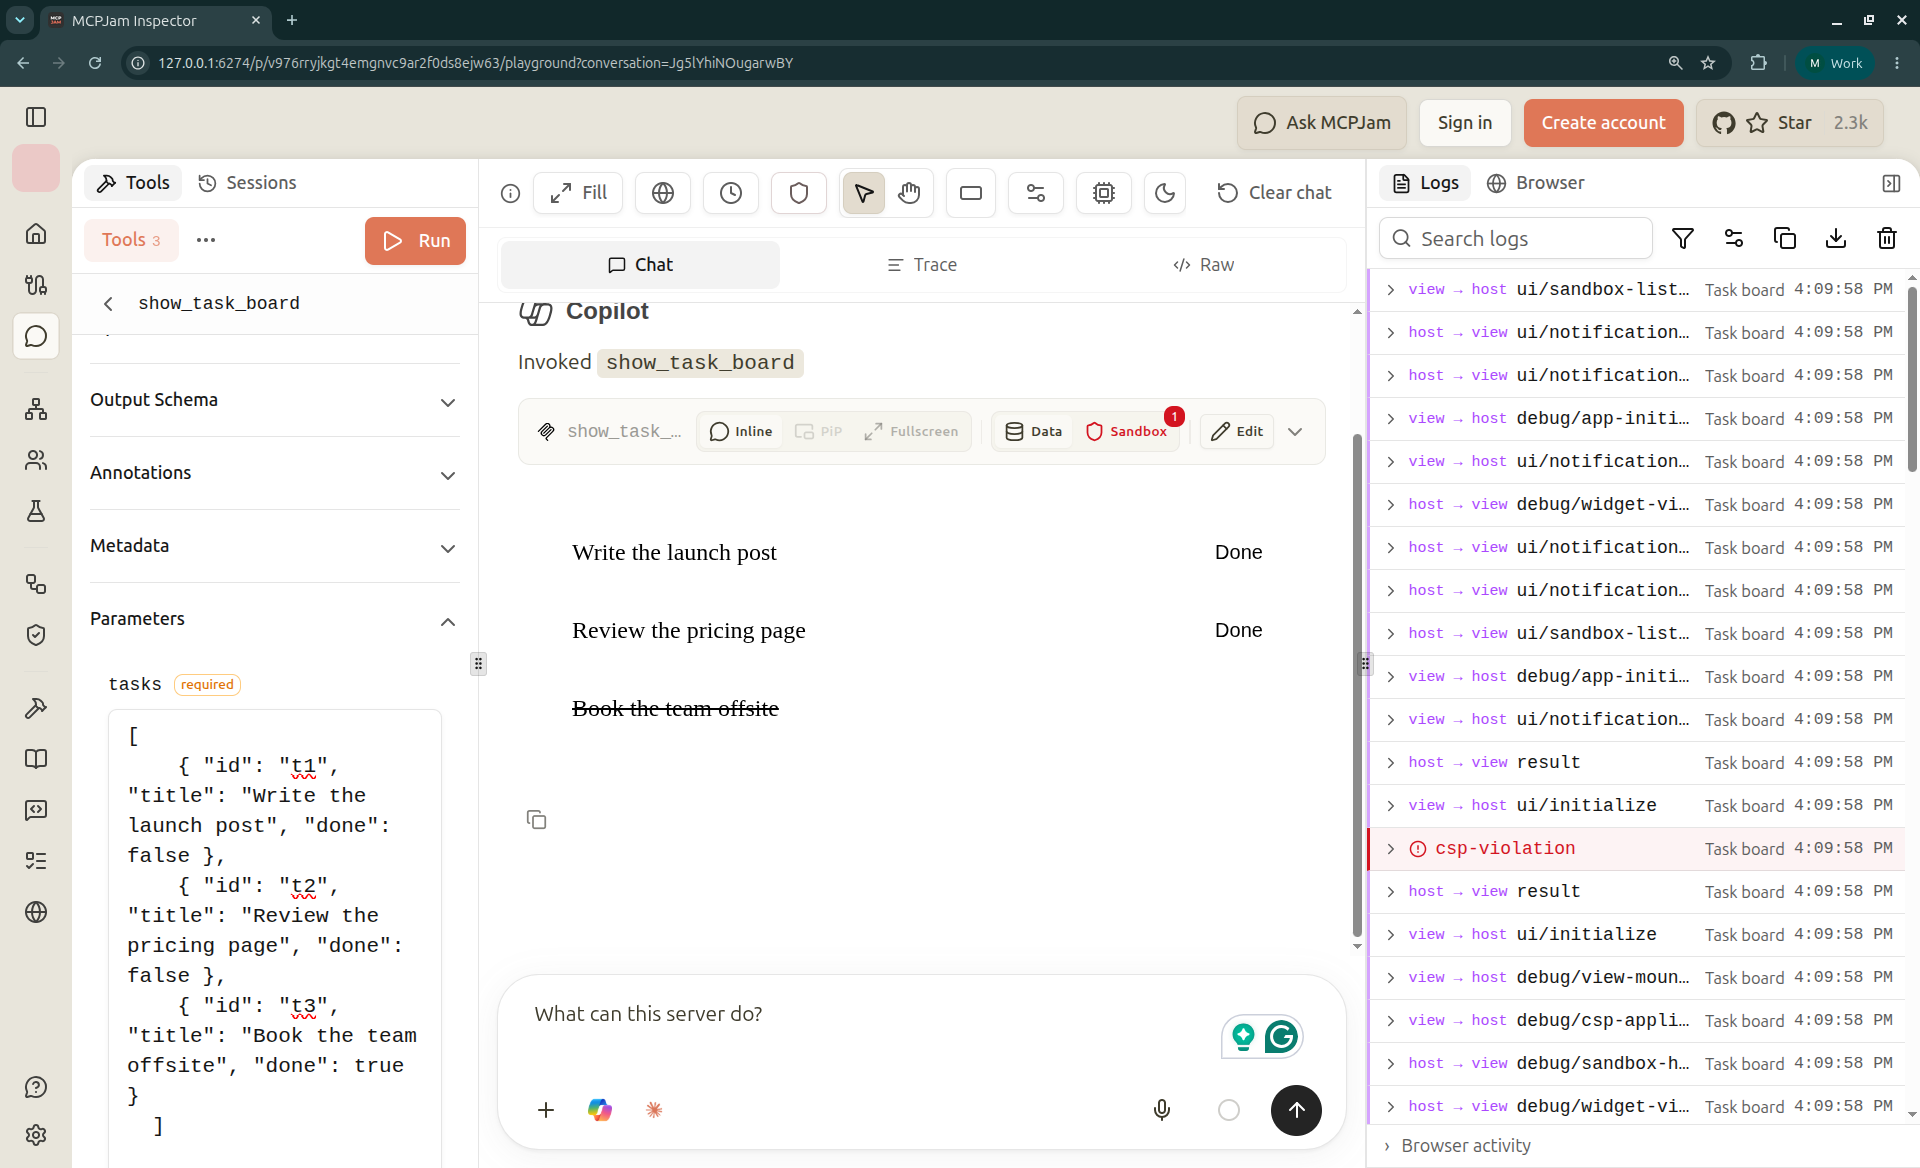
You should see the board render immediately in the widget emulator. Start with manual calls rather than chat, since that takes the model out of the picture while you check the UI. Each tool result also has panels where you can inspect the raw input, output, and errors.
With Copilot selected, MCPJam renders the board inline in Copilot's frame, up to 768 pixels wide and 400 pixels tall, with the dark theme Copilot reports. Check two things:
- The board fits the frame. All three rows should show without clipping or an inner scrollbar. Shrink the preview below 768 pixels too: titles should wrap and nothing should overflow sideways.
- The board reads well in both themes. Start in dark, then toggle to light. Text, borders, and the Done button should stay readable in each. The Claude markup styles itself with host CSS variables such as
--color-text-primary, so if something loses contrast, the markup is reading a variable that was never set. Apply the host's variables withuseHostStyles(app, app?.getHostContext())right afteruseApp, which also re-applies them on each theme change, and give each variable a fallback, such asvar(--color-text-primary, CanvasText), for any the host doesn't send.
If nothing shows up, check these in order:
- Does the tool's
resourceUriexactly match the registered URI?
- Is the MIME type
text/html;profile=mcp-app?
- Does
web/dist/component.jsexist? The server rereads it on every request, so a rebuild takes effect without a restart.
- Did the UI connect to the client? A tool call that succeeds with nothing rendered usually means
useApp(orapp.connect()) never ran, or the root element has zero height.
- What do the error panel and your browser's DevTools console say?
5. Interact with the UI and watch the messages
Click Done on "Write the launch post", then switch to the Trace view and select the complete_task request row. MCPJam shows the JSON-RPC messages between the client, your UI, and your server, so you can follow the click end to end:
- The UI sends
tools/callforcomplete_task. - The request reaches your server.
- The server responds with the updated tasks.
- The task gets a strikethrough.
Earlier in the trace, you should also see the handshake: ui/initialize when the UI connects, then ui/notifications/tool-input and ui/notifications/tool-result when the client delivers the tool call. Copilot's chat shows none of these messages. MCPJam's Trace view puts them in order alongside your server's traffic, so you can follow a click from the UI to your server and back without adding any logging to your UI.
If something breaks, the first missing step tells you where to look:
- No
ui/initializein the trace: the app never connected. CheckuseApporapp.connect(). - No
tools/callin the trace: check whether the click handler is firing. - The call appears, but the server never sees it: check the tool name and arguments.
- The server answers but the UI doesn't update: check how the UI handles the response.
Next, click a task to select it. The border highlight is React state, so it lasts until Copilot renders the board again. That's expected. If a selection must survive, keep it on the server or send it to the model with app.updateModelContext().
6. Check your CSP
A Content Security Policy (CSP) controls which domains your embedded UI can connect to or load resources from. Copilot enforces the policy your resource declares in _meta.ui.csp, and blocks anything outside it:
connectDomainscovers fetch and XHR requests.resourceDomainscovers images, fonts, and other resources.frameDomainscovers content embedded in nested iframes.
Our board makes no external requests, so its lists are empty. In larger apps, common issues include:
- an image bucket or API host you forgot to list
- a script loaded at runtime instead of bundled
- a font CDN. The board uses the host's font variable, so it doesn't need one
MCPJam's CSP testing shows what gets blocked. In the host context toolbar, set CSP mode to Strict (the default is Permissive), and a badge counts the blocked requests. Declare only the domains you use, so anyone reviewing your server can see exactly what the UI contacts. In Copilot, blocked requests show up as CSP errors in the console that Developer: Toggle Developer Tools opens.
7. Run fixed-input tool calls
Chat-driven testing is nondeterministic, so the same prompt can produce different arguments across runs. With fixed-input calls, you invoke each tool directly with arguments you choose. You can also pass deliberately invalid inputs to test error handling, so cover edge cases, missing IDs, and empty results.
In Copilot, invalid input can also come from the user. The confirmation dialog for complete_task lets the user edit the taskId the model chose, so a typo in that field reaches your server as-is. The isError message is what the model, and then the user, reads next.
These expectations assume the three-task fixture in server/src/server.ts. Tasks live in memory, so the click in step 5 already marked t1 done. Restart the server first to reset them:
Fixed-input tool call tests
Swipe to see all columns →
| Tool | Input | Expected |
|---|---|---|
list_tasks | {} | All three tasks |
list_tasks | { "status": "done" } | Only "Book the team offsite" |
list_tasks | { "status": "archived" } | Schema validation error |
complete_task | { "taskId": "t2" } | Updated list with t2 done |
complete_task | { "taskId": "nope" } | isError: true with a clear message |
complete_task | {} | Schema validation error |
show_task_board | { "tasks": [] } | "Showing 0 tasks." |
Compare each output against your declared schema.
Add one more case: a large result. Whatever a tool puts in content stays in the model's context, so a large result keeps using context on every later turn of the session. Paginate long lists, or return identifiers and let the UI fetch details with app.callServerTool().
If a future version of a tool returns images, check where they end up. In MCPJam's Copilot profile, the model can see images returned as direct content, embedded resources, or linked resources, but Copilot doesn't place tool-result media in the app surface. Draw images inside your UI instead, and list their host in resourceDomains.
If a test catches a bug, replay the same call with mcpjam tools call from the MCPJam CLI, so you can run the case automatically in future tests.
8. Test how the model uses your tools
Steps 4 through 7 verify that your tools work. This step verifies that a model reading your descriptions picks the right tool at the right time. In Playground, select Copilot as the client, try a few prompts, then open Trace to see each step from prompt to response:
- "Show me my open tasks" should call
list_tasks, thenshow_task_board. - "Mark the pricing page task as done" should call
complete_taskwitht2, which means the model first needs the IDs fromlist_tasks. - "What's a good productivity method?" shouldn't call anything.
If the model skips list_tasks or fires tools when it shouldn't, look at your tool descriptions, server instructions, and parameter names before touching your handlers.
Then pick another model from the model picker in the chat input and run the same prompts. A description that steers one model to call list_tasks first may not steer another.
These runs include only your three tools. MCPJam doesn't load Copilot's built-in tools, so it can't show whether the model picks list_tasks over #todos. You'll check that in step 9.
9. Confirm it in GitHub Copilot
MCPJam's Copilot client is an emulation. To see the board in GitHub Copilot itself, we'll use the GitHub Copilot Chat extension in VS Code. VS Code renders MCP Apps inline in chat and runs the MCP client on your machine, so it connects to your local server directly, with no tunnel and no deploy.
This is also where you confirm the description change from step 2. VS Code is the first place your tools run next to the #todos tool that change targets.
Add the server to Copilot:
- Open the Command Palette and run MCP: Add Server.
- Choose HTTP (HTTP or Server-Sent Events) and enter
http://127.0.0.1:3000/mcp. - Enter
task-boardas the server ID, then select Global > Copilot Global.
This writes the entry to ~/.copilot/mcp-config.json, a portable file with a top-level mcpServers key that other Copilot tools also read. The older .vscode/mcp.json format uses servers instead, and the guided flow now labels it deprecated.
Open the Chat view in agent mode, pick a model, and ask "Show me my open tasks." You should see the List tasks and Show task board calls run without a confirmation prompt, because both are marked readOnlyHint: true, and the board render inline under them. Then check the behavior that only Copilot can show you:
- The confirmation dialog. Ask "Mark the pricing page task as done." Copilot stops before
complete_taskand shows thetaskIdit's about to send. Approve it, and the model's reply should reflect the updated list. - The competing tool. If the model reaches for
#todosinstead of your tools, sharpen the server instructions and tool descriptions from step 2, then rerun the prompts from step 8. Users can also type#in the chat input and pick your tool explicitly. - Your editor's themes. Run Preferences: Color Theme and switch between a light and a dark theme with the board on screen. The board should stay readable in each. Try a high contrast theme too, since the host context reports only
lightordark.
If the server doesn't start or a call fails, run MCP: List Servers, select task-board, and choose Show Output for the server log. For errors inside the UI, open Developer: Toggle Developer Tools and check the console.
On Copilot Business or Enterprise, nothing from your server appears until an admin enables the MCP servers in Copilot policy. If the server shows up for you but not for a colleague, check that first.
Pre-release checklist
Before you share the server, confirm each of these. Each item names the step that covers it.
- The board renders in MCPJam's Copilot client, fits 768 × 400 pixels, and reads well in both themes (step 4).
- The trace shows
ui/initializeand the fullcomplete_taskround trip (step 5). - Strict CSP mode reports no blocked requests (step 6).
- Every fixed-input call returns what the table in step 7 expects.
- The test prompts call the right tools in the right order with more than one model (step 8).
- In Copilot, the model picks your tools over
#todos,complete_taskasks for confirmation, and the board stays readable in your editor's themes (step 9). - If the UI changed since your last release, the resource URI is bumped (
v1.html→v2.html). Clients cache the UI by its URI, so an unchanged URI can keep serving the old bundle.
What else MCPJam can do
This guide used the local Inspector, but that's only part of the platform. Once your app works locally, MCPJam covers what happens when real users and real releases get involved:
- Evals: turn workflows like "Show me my open tasks" from step 8 into repeatable test suites. You can re-run them across your chosen clients and models and track pass rate, latency, token usage, and tool calls over time.
- CI/CD gates: run those evals, along with protocol conformance and OAuth and security checks, on every pull request. If a change drops the pass rate below your threshold, the merge is blocked.
- Swarms: describe your users, and MCPJam generates personas and goals, then runs simulated users through your server in parallel across Copilot and the other clients you choose. For the task board we just built, that could be a manager reviewing open work, a teammate closing out tasks, and someone asking for a task that doesn't exist. You can compare how each client behaves side by side.
- User Testing: share a preview link with real testers, including guests, and collect per-turn ratings as they use your app. MCPJam turns those sessions into findings and insights, so you can measure sentiment and spot usability gaps before launch.
All of this works with local servers through the desktop app, the CLI, or the SDK. So the fixed-input cases from step 7 and the model tests from step 8 can grow into a regression suite that runs on every release.
What MCPJam can't tell you
One thing still needs GitHub Copilot itself: its chat UI. The tool confirmation dialog, the chat input that sendMessage() fills, and the attachment a context update becomes are all drawn by VS Code, outside your app's iframe. MCPJam traces the ui/message and ui/update-model-context calls behind the last two, but only Copilot shows what the user sees.
So do one final pass in Copilot before you share the server. By then, you've fixed what MCPJam can catch, so this pass only needs to cover the chat UI.
Start testing your GitHub Copilot MCP Apps
Clone the example repo and launch MCPJam with:
npx @mcpjam/inspector@latestFAQ
How do I create an MCP App for GitHub Copilot?
Build an MCP server with the official SDK. Define focused tools with schemas and annotations, register a ui:// resource with registerAppResource(), and link a tool to it through _meta.ui.resourceUri. Serve it over Streamable HTTP, conventionally at /mcp, then add it to Copilot with MCP: Add Server and call it from Copilot in agent mode.
Which Copilot plans support MCP Apps?
On Copilot Free, Pro, and Pro+, you can add MCP servers yourself. On Copilot Business and Enterprise, an admin has to enable the MCP servers in Copilot policy first. MCPJam needs no Copilot plan at all: it renders the UI, calls tools, and traces messages locally, and for model testing it provides hosted models or uses your own API credentials.
Do I need a tunnel to test GitHub Copilot MCP Apps?
No. Copilot and MCPJam both connect to your server on localhost. You need a public HTTPS URL only when you share the server with people who can't reach your machine.
Why isn't my MCP App rendering in Copilot?
Call the render tool in MCPJam's Playground with Copilot selected. If the UI renders there, the problem is in your Copilot setup: check the server log under MCP: List Servers > Show Output, and on Business or Enterprise, the MCP servers in Copilot policy. If it doesn't render, the problem is in your server or UI, and the checklist in step 4 walks through the causes.
Can I use MCPJam's hosted app with a local server?
No. The hosted app only accepts HTTPS URLs. Use npx @mcpjam/inspector@latest or the desktop app instead.