The MCP authentication checklist (November 2025 spec)
MCP authorization allows your users to securely access resources and tools exposed by your MCP server. Though implementing auth is optional, it’s recommended especially at enterprise where there’s permissioning in the underlying APIs, auditing of user actions, and access to restricted information is involved.
The full MCP authorization spec can be pretty daunting. We created this MCP authentication checklist as a way to quickly understand how to properly implement auth as an MCP server developer with code snippets for reference. We’ll also be covering what to look for in the November 2025 MCP spec with the introduction of Client ID Metadata Documents (CIMD).
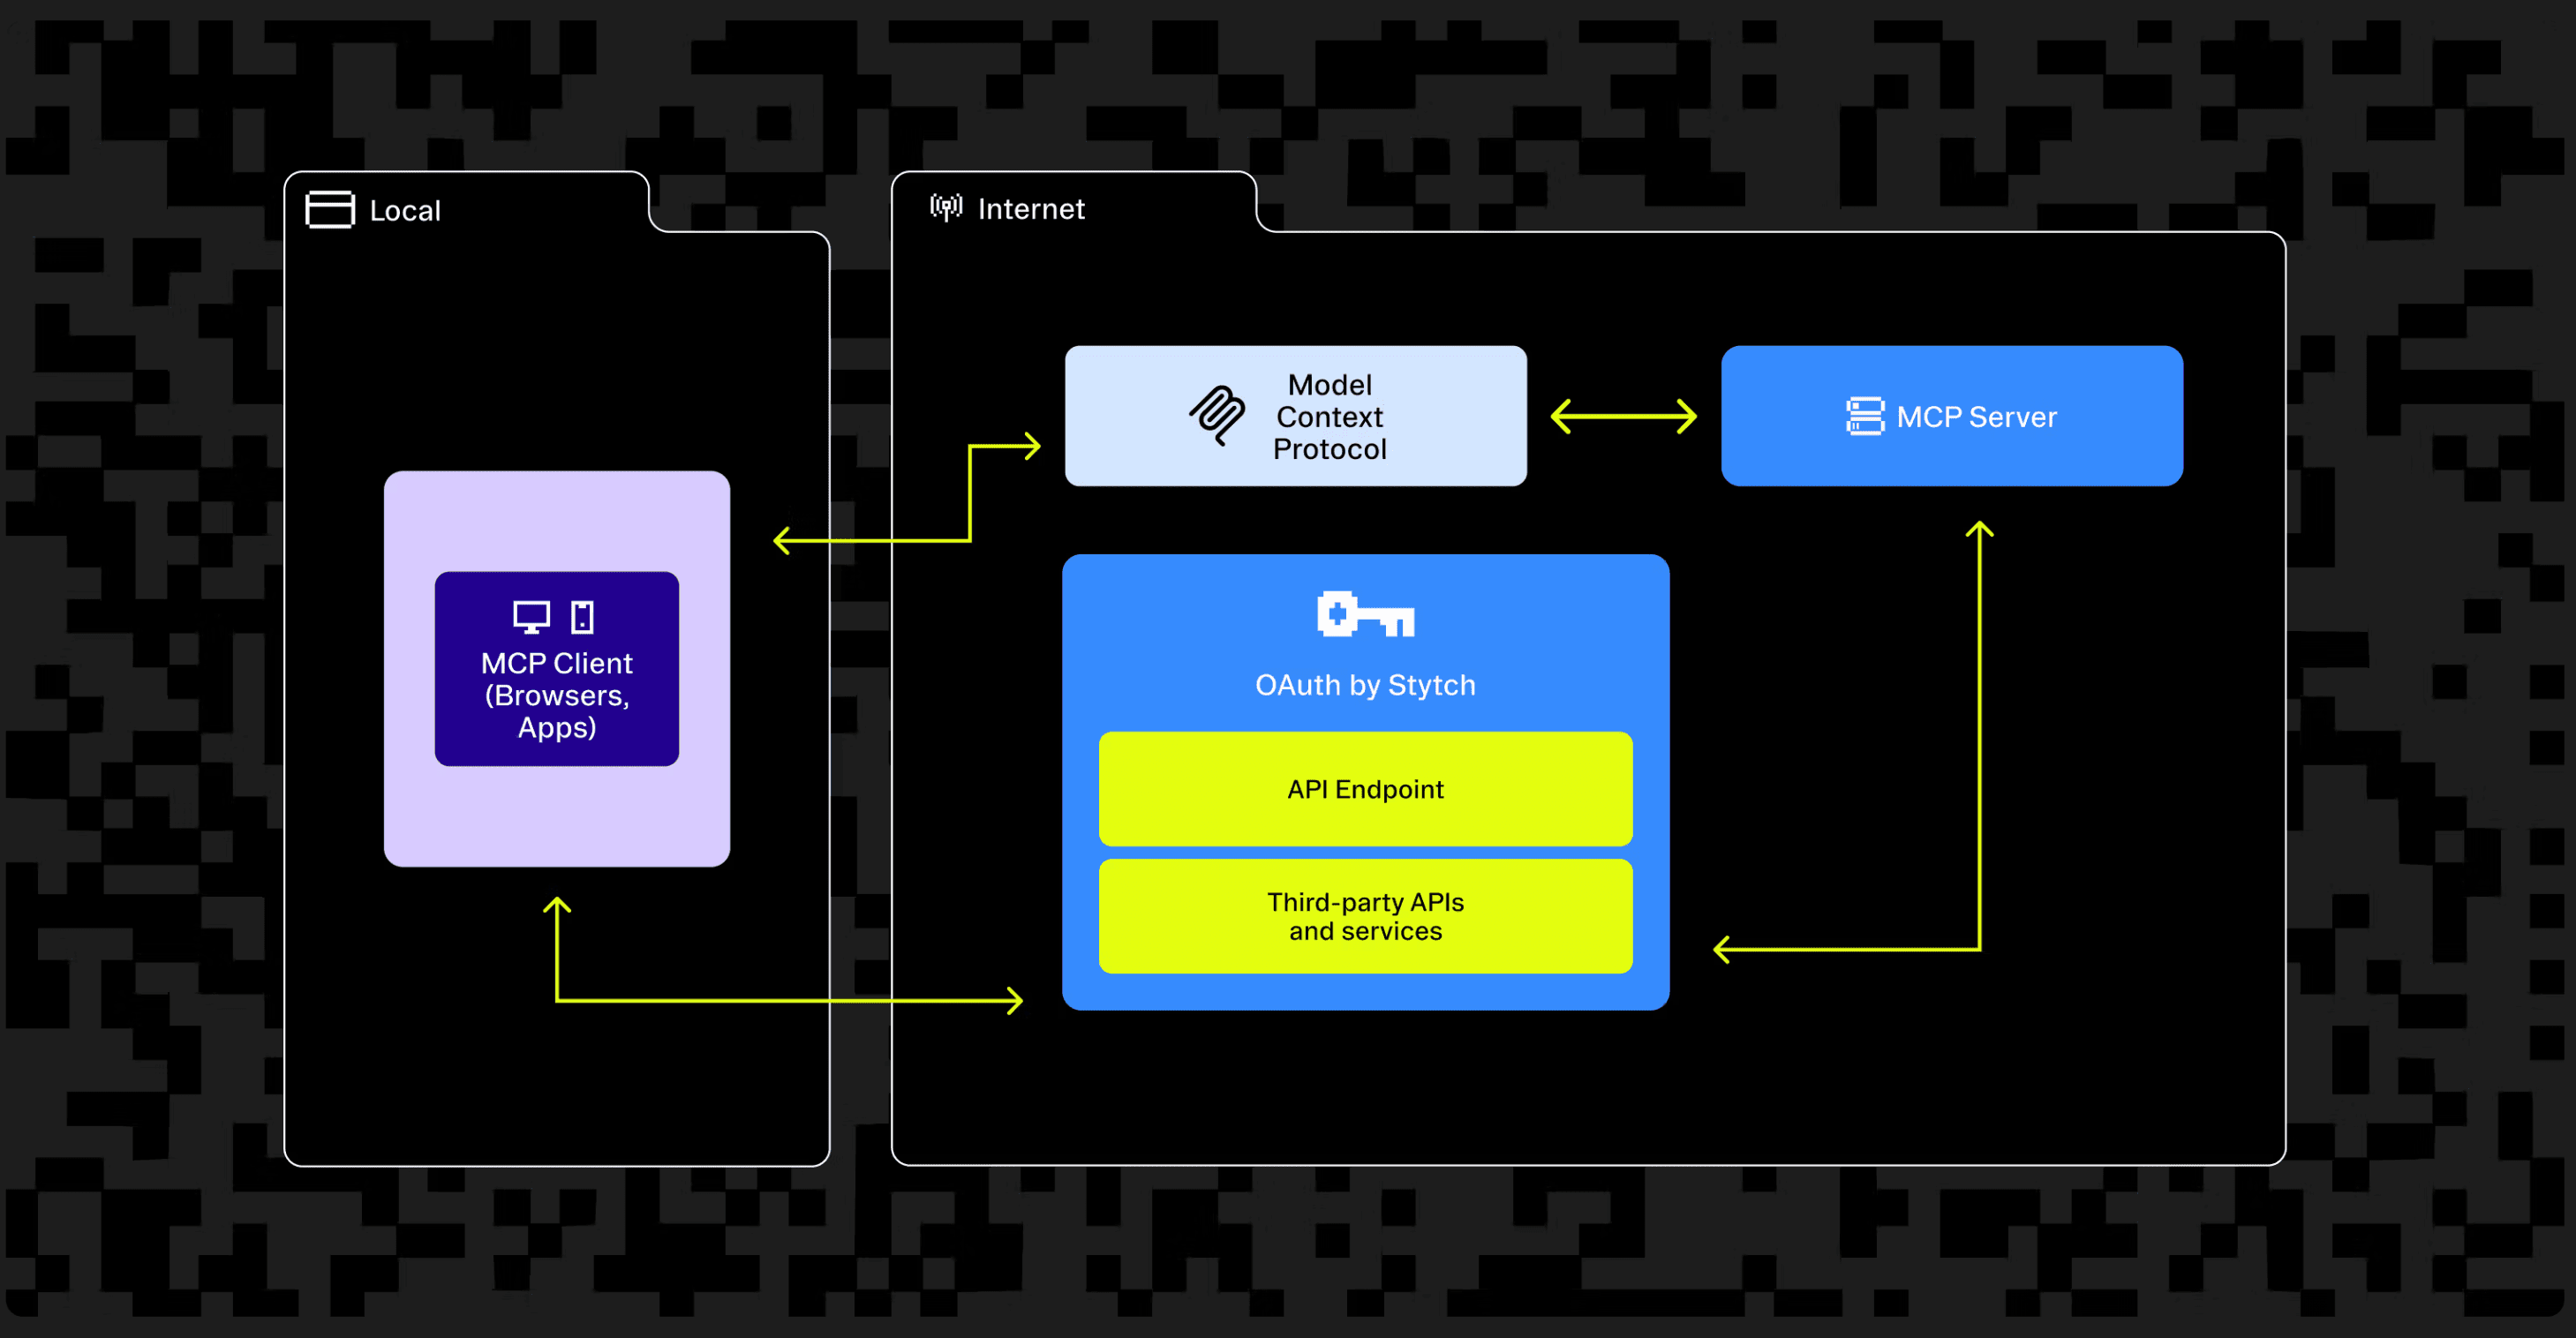
Overview of MCP authorization
These are the three components and their roles in the MCP authorization flow
| Component | Role |
|---|---|
| MCP server (Resource Server) | Validates tokens, returns 401 with WWW-Authenticate header, and publishes a resource metadata endpoint to direct the client to the authorization server. |
| Authorization server | Authenticates the user, performs the OAuth 2.1 handshake with the MCP client, and serves tokens to the client. |
| MCP Client | Interacts with the resource server and authorization server; the user side of the OAuth handshake. |
This is what the authorization flow looks like at a high level. We’ll be going in depth step by step in the following sections.

Step 1: Client makes an initial call to your MCP server
The MCP client tries to make a call to your MCP server, but it does not have a bearer token. In the case where a bearer token is missing or incorrect, the server throws a 401 and authorization flow is initialized.
curl -X POST https://my-mcp.com/mcp \
  -H "Content-Type: application/json" \
  -d '{
    "method": "initialize",
    "jsonrpc": "2.0",
    "params": { ... }
}'Check: Your MCP server returns a 401 with WWW-Authenticate when no bearer token is presented, or invalid token presented.
Your MCP server must validate the existence of an authorization header and validate the bearer token. If the bearer token is missing or the bearer token is invalid, the MCP server must reject the request with a 401 Unauthorized and respond with a mandatory WWW-Authenticate header.
The WWW-Authenticate header contains a resource_metadata parameter that tells the client where the Protected Resource Metadata (PRM) document is located. The PRM is fetched in Step 2.
HTTP/1.1 401 Unauthorized
WWW-Authenticate: Bearer realm="mcp",
  resource_metadata="https://my-mcp.com/.well-known/oauth-protected-resource"
This is how you might implement it in your MCP server’s /mcp endpoint:
app.post("/mcp", (req, res) => {
  const authHeader = req.header("Authorization") || "";
  const bearerToken = extractBearerToken(authHeader);
  const isValidToken = validateToken(bearerToken)

  if (!isBearer || !isValidToken) {
    return res
      .status(401)
      .set(
        "WWW-Authenticate",
        'Bearer realm="My MCP", resource_metadata_uri="https://my-mcp.com/.well-known/oauth-protected-resource"'
      )
      .json({ error: "unauthorized", message: "Authentication required" });
  }
  ...
});
Step 2: Client fetches your protected resource metadata document (.well-known/oauth-protected-resource)
The MCP client makes a call to your MCP server’s OAuth protected resource URL endpoint to get the protected resource metadata (PRM) document.
curl -X GET "https://my-mcp.com/.well-known/oauth-protected-resource" -H "Accept: application/json"Check: Your PRM endpoint returns the metadata in a JSON blob
Make sure your endpoint returns a JSON blob that conforms to what a PRM document looks like. You can add optional fields in the PRM document such as bearer_methods_supported and jwks_uri. You can see the full PRM document structure in RFC 9728 section 2.
HTTP/1.1 200 OK
{
  "resource": "https://my-mcp.com/mcp",
  "authorization_servers": ["https://auth.my-mcp.com"],
  "scopes_supported": ["mcp:tools", "mcp:resources"]
}
Step 3: Client makes a request to the authorization server to discover its properties
The client now knows where your authorization server is from the authorization_servers parameter in the previous step. It now needs to discover what properties your authorization server has. Authorization servers must provide at least one of. The client will now attempt to fetch metadata from mulitple endpoints, since some Authorization servers use OAuth 2.0 Authorization Server Metadata (RFC8414), others use OpenID Connect Discovery 1.0. The client makes a call to your authorization server URL with .well-known/oauth-authorization-server.
curl -X GET "https://auth.my-mcp.com/.well-known/oauth-authorization-server"Check: Your authorization server returns its own metadata at the .well-known/oauth-authorization-server URL
Your authorization server should return a set of metadata properties that the client can use to complete the authorization flow.
HTTP/1.1 200 OK
{
"issuer": "https://auth.my-mcp.com",
"authorization_endpoint": "https://auth.my-mcp.com/authorize",
"token_endpoint": "https://auth.my-mcp.com/token",
"registration_endpoint": "https://auth.my-mcp.com/register",
"jwks_uri": "https://auth.my-mcp.com/.well-known/jwks.json",
"scopes_supported": ["mcp:read", "mcp:write", "offline_access"],
"grant_types_supported": ["authorization_code", "refresh_token"],
"code_challenge_methods_supported": ["S256"],
"response_types_supported": ["code"],
"claims_supported": ["aud", "iss", "exp", "scope", "sub"],
"client_id_metadata_document_supported": true
}
Client Registration
Your authorization server should be prepared to handle at least one of the following cases: pre-registrated client, CIMD, or DCR. With the November spec introducing CIMD, we highly recommend that you be able to handle all paths.
CIMD Path
Client ID Metadata Documents (CIMD) are an alternative registration process where the MCP Client will self-register using a static document URL. Authorization Servers advertise support for this method by providing a client_id_metadata_document_supported: true field in the Authorization Server Metadata response. The MCP Client will pass their CIMD URL as the client ID in the authorization request in the next step. Clients will now need to have their CIMD accessible via HTTPS. This should also reduce the storage load on the AS since DCR constantly created ephemeral clients.
Check: Your MCP client hosts a publicly accessible JSON document
curl -s "https://client.dev/oauth/metadata.json" | jq
# Output
{
  "client_id": "https://client.dev/oauth/metadata.json",
  "client_name": "client.dev",
  "client_uri": "https://client.dev",
  "redirect_uris": [
    "https://client.dev/oauth/callback"
  ],
  "grant_types": [
    "authorization_code"
  ],
  "response_types": [
    "code"
  ],
  "token_endpoint_auth_method": "none"
}
DCR Path
Dynamic Client Registration (DCR) is a process where the MCP Client will self-register with the Authorization Server without any human interaction. Authorization Servers advertise support for this method by providing a registration_endpoint field in the Authorization Server Metadata response (Step 3). The MCP Client will send a POST request to this endpoint, and will be issued a new Client ID in the response. The POST request must contain at least one redirect_uri for the client to use.
The full set of fields that may be sent to the Authorization Server can be found here.
curl --request POST 	--url "https://auth.my-mcp.com/register" 	-H 'Content-Type: application/json' 	-d '{
      "client_name": "Dynamically registered client",
      "client_uri": "https://client.example.com/about",
      "redirect_uris": ["http://localhost:3000/oauth2/callback"]
    }'
Pre-Registration Path
Authorization Servers that don't support DCR or CIMD can still be used for MCP Authentication - you'll just need to register a client by hand ahead of time. Follow your MCP Client and your Authorization Server's instructions to do this - you'll end up with a Client ID you can copy and paste into your MCP Client to complete this integration.
Client makes an authorization request to the /authorize endpoint
The MCP Client will construct an Authorization Request using the authorization_url from the Authorization Server Metadata. It will pass all arguments to the authorization URL as query parameters. The client will pass the following information via search params:
client_id: The client ID from the previous step - either from DCR, CIMD, or registered beforehand
redirect_uri: The location to return the user to after authorization completes. Registered during the previous step
scope: A space-delimited list of permissions the MCP Client requests from the user
resource: The Resource URL returned from the OAuth Protected Resource endpoint
response_type: The expected response format from the Authorization Server. For MCP flows, this is always code
state: An opaque value that will be returned to the MCP Client. The Client will use this value to preserve application state across redirects
code_challenge: A one-time secret used for PKCE
code_challenge_method: The PKCE algorithm to use. For MCP flows, this is always S256
https://auth.my-mcp.com/authorize?
	client_id=my-cool-client-id
	&resource=https://my-mcp.com/mcp
	&scope=openid email profile
&state=4b840b
	&redirect_uri=http://localhost:6247/oauth/callback
	&code_challenge=s_C0nEGkpTRmp3VfT2Eq5U9pFwveCNSE_Ye7qmqFEcU
	&code_challenge_method=S256
	&response_type=code
The MCP Client will direct the user to open this URL in their default browser.
Your Auth server shows them the Auth consent screen (Render consent using metadata DCR / CIMD)
The user is taken to your authorization server’s auth consent screen.
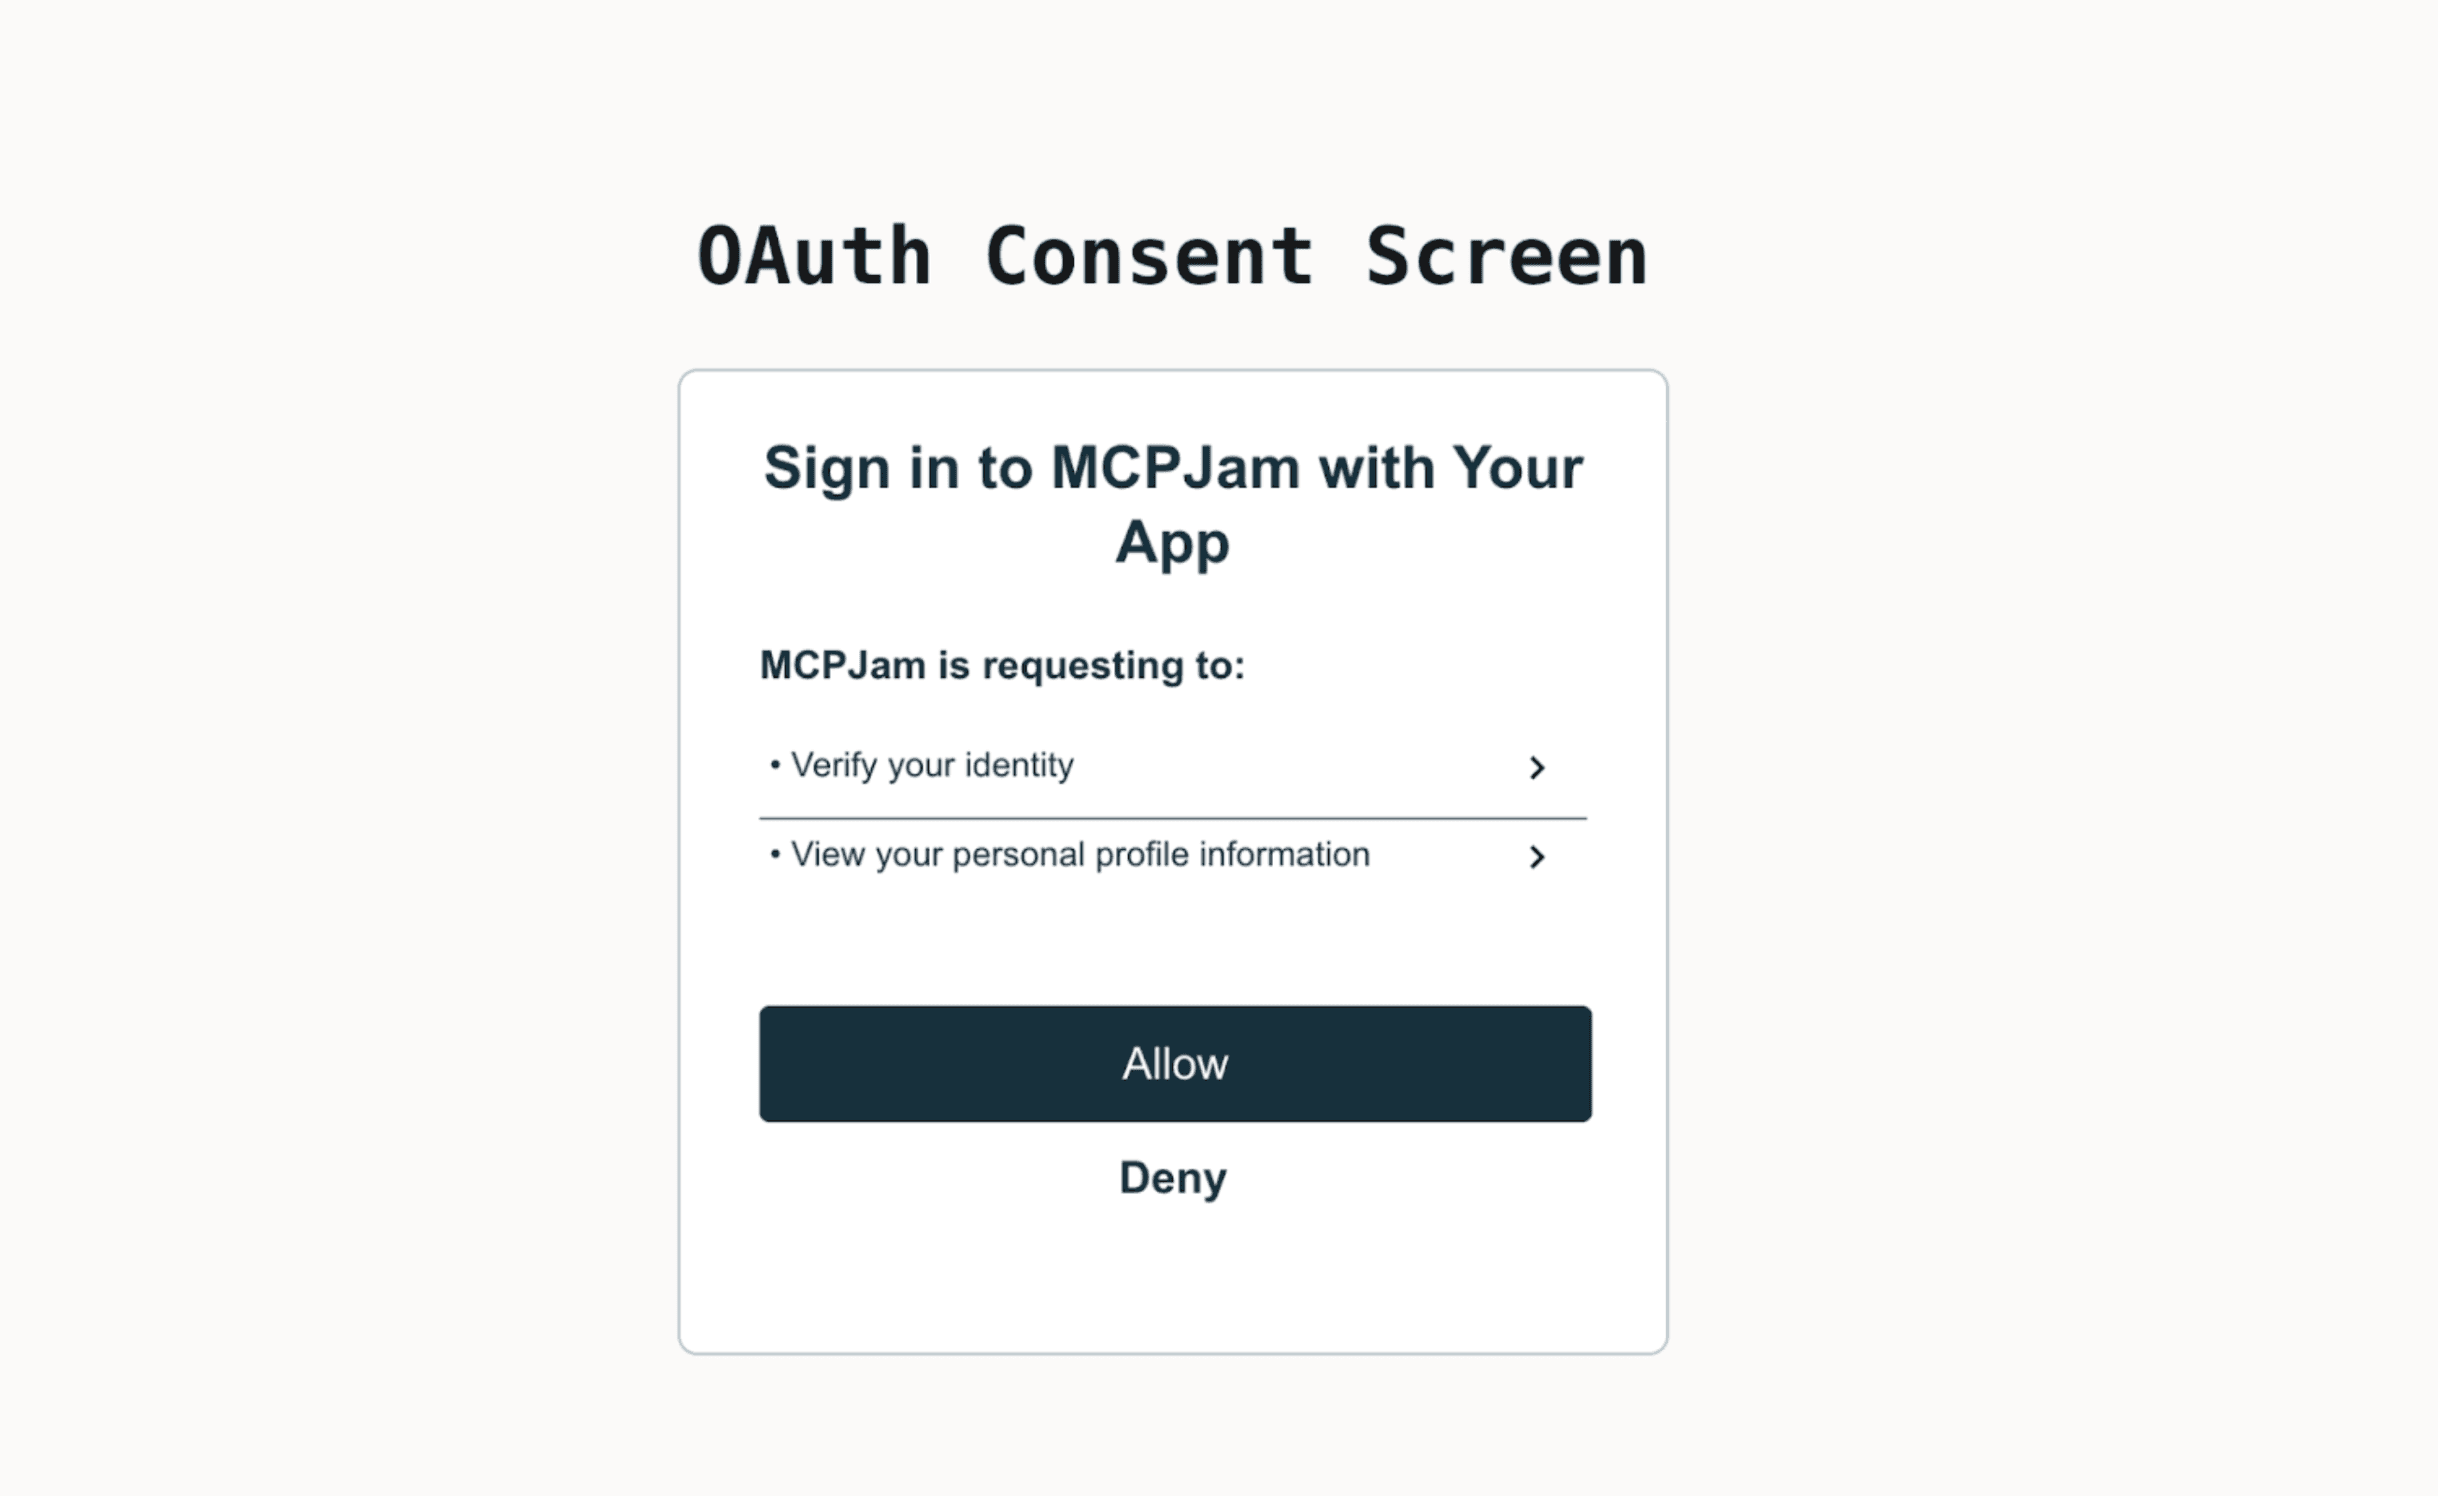
After going through the consent screen, the authorization server should redirect the user back to the redirect URL with a ?code=one-time-code field in the query parameters. The redirect URL is pulled from the redirect_uri parameter passed in the previous step.
Client makes a token request to the /token endpoint
The MCP client now sends a back-channel request to the token_endpoint URL to exchange the authorization code for tokens. This is a server-to-server call that does not involve the user’s browser.
The token endpoint validates the code and verifies that the code_verifier matches the earlier challenge. This confirms that the same client that initiated the flow is redeeming the code. If all checks pass, the server issues an access token. A refresh token is sometimes included as well.
The body should have the following structure:
{
  "access_token": "ySfgkSd81SGs...",
  "refresh_token": "fdSSd2...",
  "token_type": "Bearer",
  "expires_in": 3600
}
Client calls your MCP server with the bearer token
The MCP client now has the bearer token. The client makes the same exact call as Step 1, but now with the bearer token. The token gets validated and the MCP server no longer returns a 401 unauthorized.
curl -X POST https://my-mcp.com/mcp
     -H "Content-Type: application/json"
     -H "Authorization: Bearer ySfgkSd81SGss6FSdsdDKG..."
Verifying OAuth with MCPJam
We built an OAuth debugger to visualize MCP authorization and verify that your authorization implementation is correct. We designed the debugger to ensure that your MCP server and authorization server conforms to the MCP OAuth spec and implements every step mentioned in this article correctly. The MCP OAuth testing page has a shorter overview of what the debugger checks.
The project is open source, I encourage you to check it out. Starting up the inspector is a single command
npx @mcpjam/inspector@latestHope that helps with debugging!
Quickly set up an authorization server with Stytch
If you want to quickly set up your MCP server with OAuth, I'd give Stytch a try.
We've had a smooth experience setting up an authorization server with Stytch. We use our own user management software, but Stytch Connected Apps has made it really easy to set up an auth server while using my existing identity provider. User authentication is shared between my MCP server and my other applications.