Deploy a MCP App (UI) on Cloudflare Workers
The Model Context Protocol (MCP) has standardized how AI models access data. But until recently, that interaction was purely text-based. With the introduction of MCP Apps (SEP-1865), developers can now deliver rich, interactive user interfaces directly within chat clients.
However, building these apps presents a new infrastructure challenge: you need an MCP server to handle the logic and a way to host the frontend assets that the client renders. We're sharing a Cloudflare Workers template to make this process easier and faster for you to start developing and shipping MCP apps.
If you aren't familiar with MCP App basics I'd recommend reading our other blog post about building your first app before jumping into this one.
File Structure
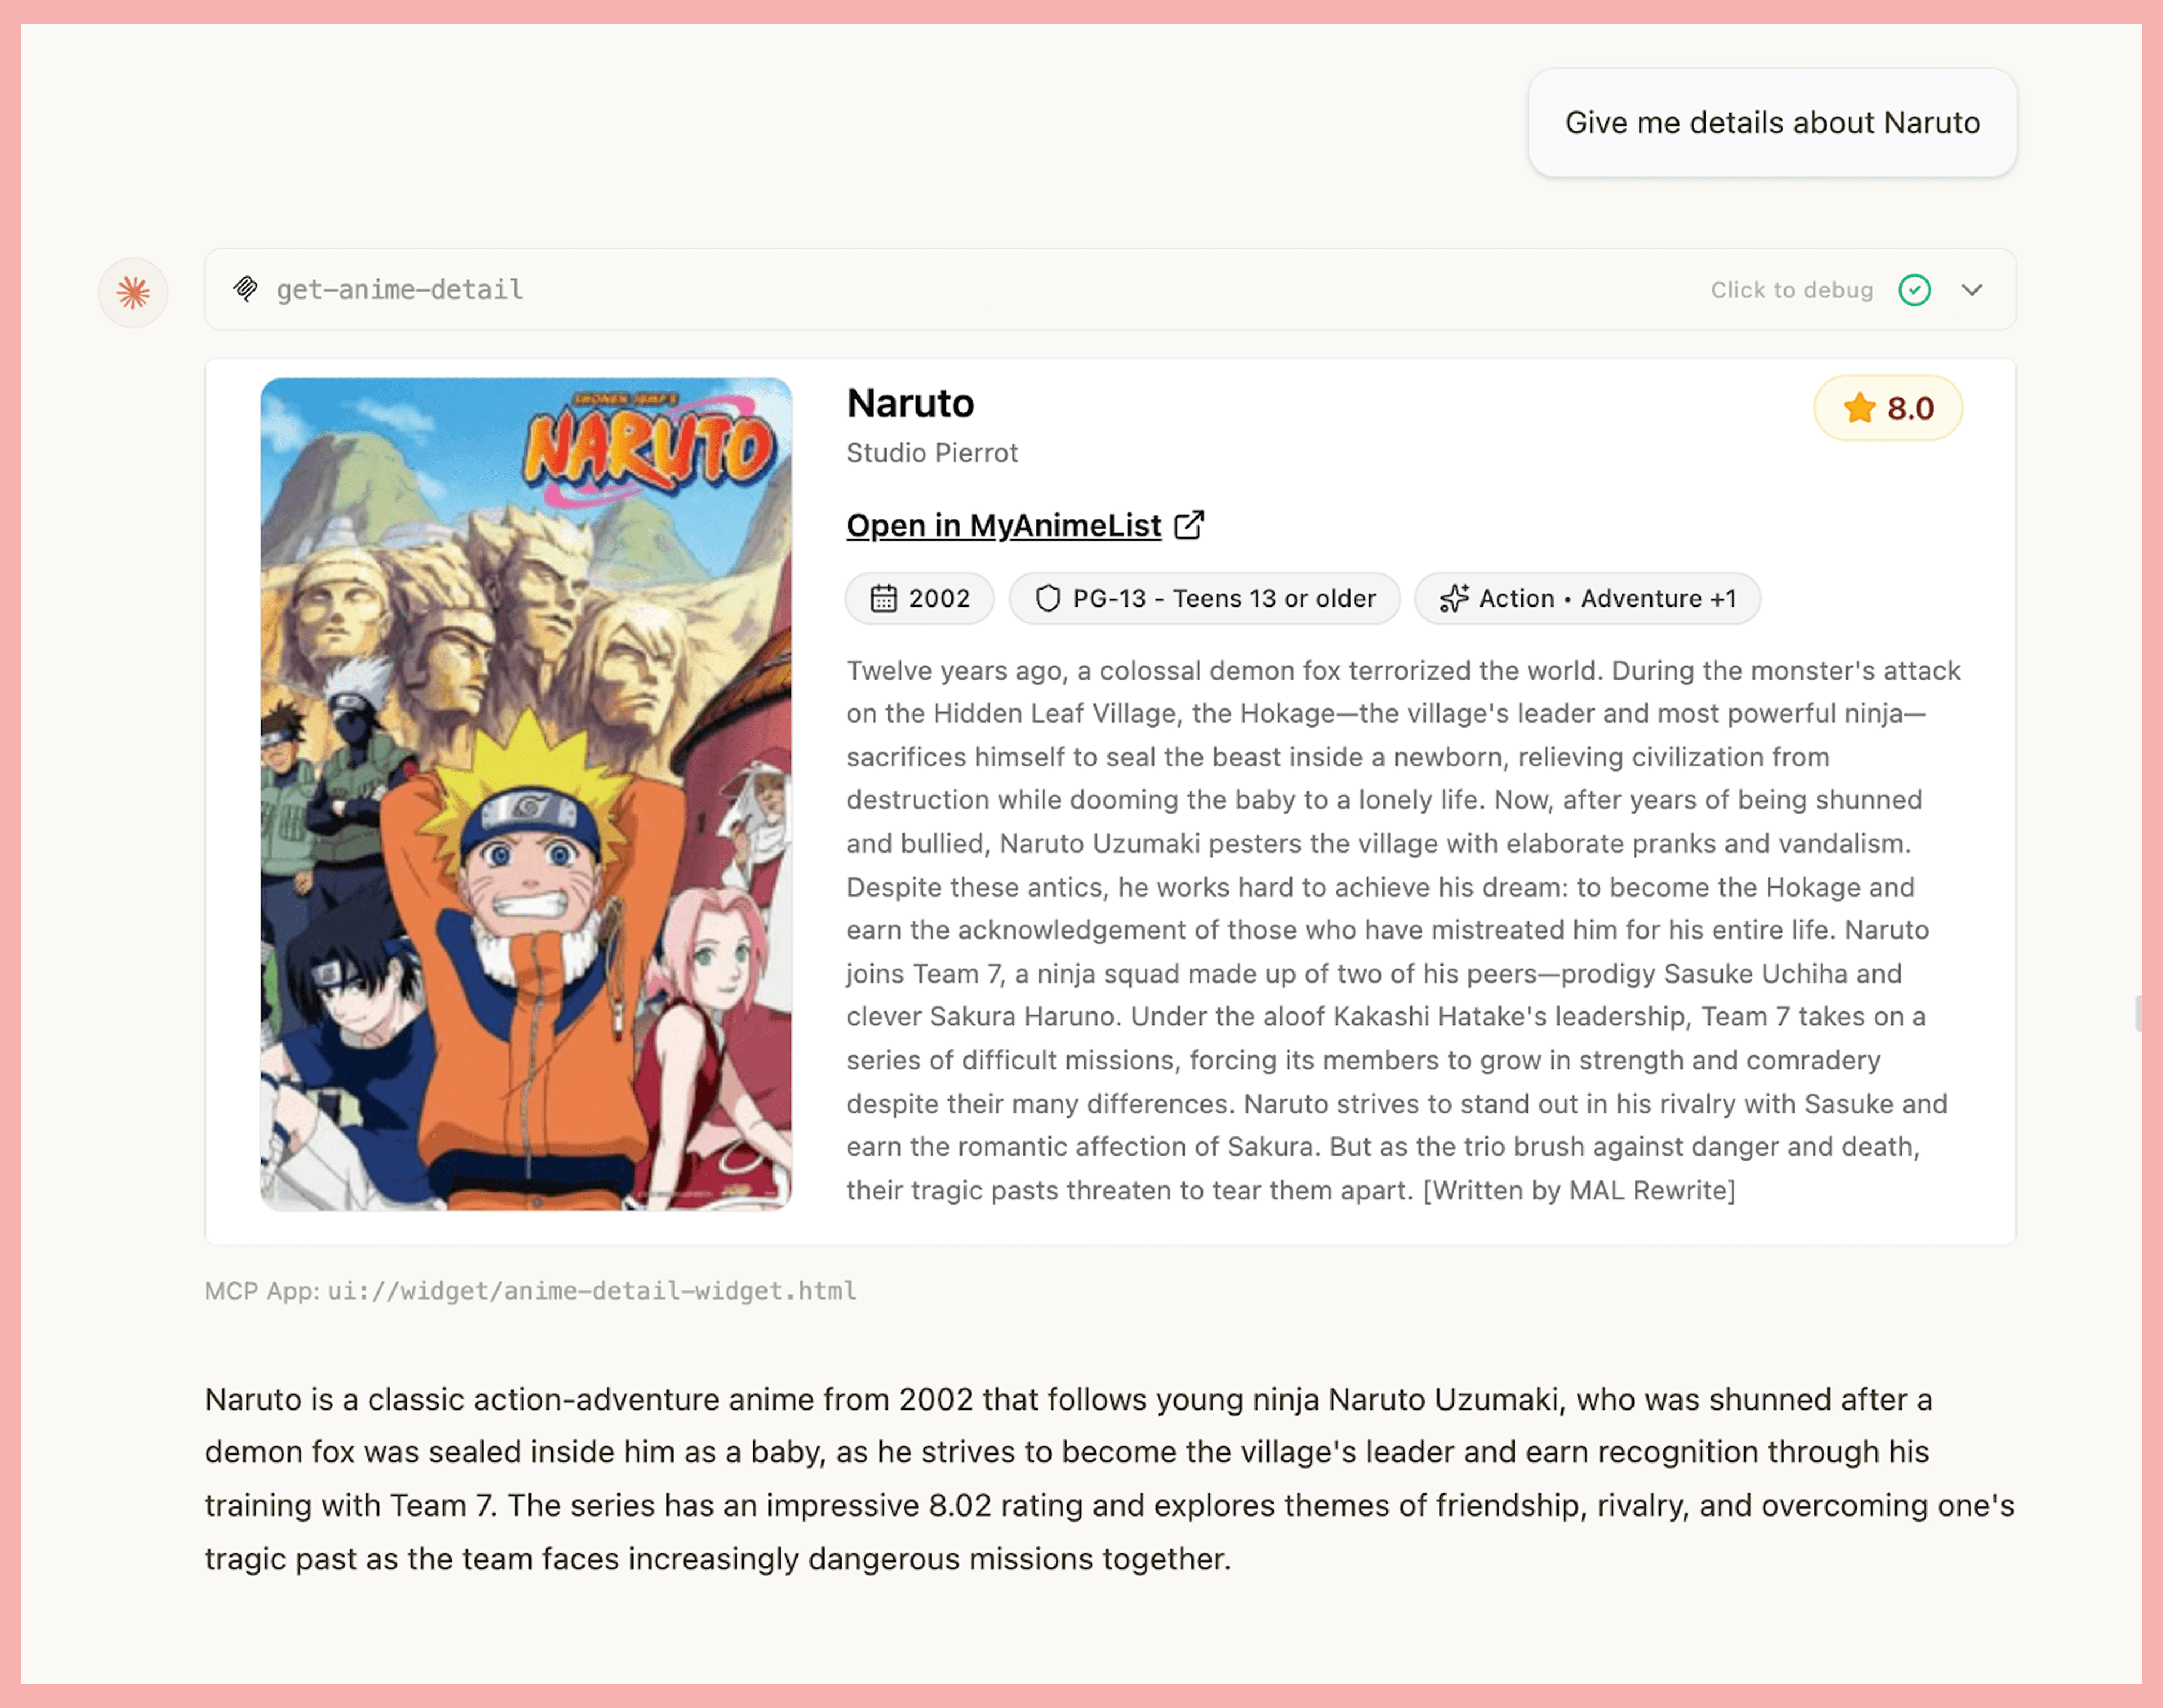
The template repository fetches information about anime and renders it as a widget in the chat. Let's break down the file structure.
├── server
│   ├── index.ts
│   └── mcp.ts
├── web
│   ├── components
│   │   ├── anime-card.tsx
│   └── widgets
│       ├── anime-detail-widget.html
│       └── anime-widget.tsx
├── vite.config.ts
└── wrangler.jsonc
The template repository is split into two parts, the Hono backend in server/ and the web/ React components.
Wrangler Config
For those who have never deployed on Cloudflare before, your entire configuration lives in the wrangler.jsonc file.
{
  "$schema": "node_modules/wrangler/config-schema.json",
  "name": "mcp-app-workers-template",
  "main": "server/index.ts",
  "compatibility_date": "2025-12-01",
  "compatibility_flags": ["nodejs_compat"],
  "build": {
    "command": "npm run build"
  },
  "assets": {
    "directory": "./web/dist/widgets",
    "binding": "ASSETS",
  },
}
The important options here are our build and assets objects. Because the worker is only serving the Hono app, we need to make sure that our worker builds our widgets before it deploys. We then have to create a binding to those assets so we can access them and serve them in Hono. A binding acts as a bridge, making resources accessible within your Hono application logic.
Subscribe to the blog
We share our learnings with you every week.
MCP Server
The MCP server lives in server/mcp.ts. We have multiple helper functions to help make registering widgets and loading assets easier. First we have a loadHtml helper that loads the built widget from our asset binding so we can serve it.
async function loadHtml(
  assets: AssetsBinding | undefined,
  htmlPath: string,
): Promise<string> {
  if (!assets) {
    throw new Error("ASSETS binding not available");
  }

  const buildRequest = (path: string) =>
    // Assets fetcher expects an absolute URL, so use a placeholder origin.
    new Request(new URL(path, "https://assets.invalid").toString());

  // Fetch HTML file from the ASSETS binding
  const htmlResponse = await assets.fetch(buildRequest(htmlPath));

  if (!htmlResponse.ok) {
    throw new Error(`Failed to fetch HTML: ${htmlResponse.status}`);
  }

  return await htmlResponse.text();
}
We take in our assets binding and the path to the built HTML widget. We then fetch it from our assets binding and return the text so we can add it to our MCP server.
We then have our registerWidget helper function which makes registering all types of MCP widgets easier than ever.
function registerWidget(server: McpServer, assets: AssetsBinding, config: WidgetConfig) {
  server.registerResource(
    config.name,
    config.resourceUri,
    { mimeType: "text/html+mcp" },
    async (uri) => {
      // 1. Load compiled HTML from Cloudflare Assets
      const htmlContent = await loadHtml(assets, config.htmlPath);

      // 2. Construct the MCP response
      return {
        contents: [{
          uri: uri.href,
          mimeType: "text/html+mcp",
          text: htmlContent,
          // 3. Attach UI-specific metadata (SEP-1865)
          _meta: {
            ui: {
              csp: {
                connectDomains: config.connectDomains,
                resourceDomains: config.resourceDomains,
              },
              domain: config.domain,
              prefersBorder: config.prefersBorder,
            }
          }
        }]
      };
    }
  );
}
The registerWidget function simplifies adding an MCP widget by taking the McpServer, AssetsBinding (for frontend files), and WidgetConfig.
It uses server.registerResource(...) and the loadHtml helper to asynchronously fetch the compiled HTML content from the asset bindings.
It then constructs the MCP response, including the htmlContent with the "text/html+mcp" MIME type. Essential security and rendering information (CSP, UI preferences) are included in the SEP-1865 compliant _meta.ui block, instructing the client on safe widget rendering.
Finally we have a function to create our MCP server which will register our widgets and tools so we can use it in our chat apps. In this example, we have a widget and tool to fetch anime data from an API and render the corresponding widget.
export function createMcpServer(assets: AssetsBinding) {
  const server = new McpServer({
    name: "mcp-app-workers-template",
    version: "0.0.1",
  });

  // 1. Register the UI Resource
  // This makes the HTML accessible to the host via "ui://..."
  registerWidget(server, assets, {
    name: "anime-detail-widget",
    resourceUri: "ui://widget/anime-detail-widget.html",
    htmlPath: "/anime-detail-widget.html",
    descripition: "Interactive anime detail widget",
    resourceDomains: ["https://cdn.myanimelist.net/"], // Allow images from external CDN
  });

  // 2. Register the Tool
  server.registerTool(
    "get-anime-detail",
    {
      description: "Search for anime and return details",
      inputSchema: z.object({ query: z.string() }),
      // 3. Link the Tool to the UI
      // This tells the host: "When you run this tool, show this UI."
      _meta: {
        "ui/resourceUri": "ui://widget/anime-detail-widget.html",
      },
    },
    async ({ query }) => {
      const animeData = await fetchAnimeFromAPI(query);

      return {
        // Fallback text for clients that don't support UI
        content: [{
          type: "text",
          text: `Found anime: ${animeData.title}`,
        }],
        // The actual data payload passed to your React component
        structuredContent: {
          anime: animeData,
        },
      };
    }
  );

  return server;
}
Serving the MCP server
With all our functions, we can finally serve our MCP server via Hono. Our index.ts file contains our Hono app. This file is also our main entry point for our worker (as defined above in wrangler.jsonc).
import { Hono } from "hono";
import { createMcpHandler } from "agents/mcp";
import { createMcpServer } from "./mcp";

const app = new Hono<{ Bindings: CloudflareBindings }>();

app.all("/mcp", async (c) => {
  // Create server with ASSETS binding
  const server = createMcpServer(c.env.ASSETS);
  const mcpFetchHandler = createMcpHandler(server);
  return mcpFetchHandler(
    c.req.raw,
    c.env,
    c.executionCtx as ExecutionContext<CloudflareBindings>,
  );
});

export default app;
The critical logic lives in the /mcp endpoint: here, we instantiate our MCP server and pass it the c.env.ASSETS binding. This binding is the bridge that gives your server access to the static frontend files stored in Cloudflare Assets. Finally, the createMcpHandler utility wraps everything, translating standard Web Fetch API requests into the specific MCP protocol messages needed for communication.
Widget Components
Now we need to write our widgets. Our template stores all widget code in the web/directory. We also added ShadCN support to allow for beautifully built widgets. Here's a code snippet for our example anime details widget:
// web/widgets/anime-widget.tsx
import { useState } from "react";
import { useApp } from "@modelcontextprotocol/ext-apps/react";
import { AnimeCard } from "../components/anime-card";

export default function AnimeWidget() {
  const [anime, setAnime] = useState(null);

  // 1. Initialize the connection to the Host
  const { app } = useApp({
    appInfo: { name: "anime-detail-widget", version: "0.0.1" },
    onAppCreated: (appInstance) => {

      // 2. Listen for the Tool Result
      // This triggers when the server finishes the 'get-anime-detail' tool
      appInstance.ontoolresult = (params) => {
        // The 'structuredContent' matches what we returned in server/mcp.ts
        const payload = params.structuredContent;

        if (payload?.anime) {
          setAnime(payload.anime);
        }
      };
    },
  });

  // 3. Host Interaction (UI -> Host)
  // We can ask the Host to perform actions, like opening a browser URL
  const handleOpenLink = () => {
    if (app && anime?.url) {
      app.sendOpenLink({ url: anime.url });
    }
  };

  if (!anime) {
    return <div className="p-6 text-muted-foreground">Waiting for tool execution...</div>;
  }

  return (
    <div className="min-h-screen bg-background">
      <AnimeCard
        {...anime}
        onOpenMyAnimeList={handleOpenLink}
      />
    </div>
  );
}
The actual React component was abstracted to allow the widget component to focus solely on host interactions. By utilizing the useApp hook, the widget can easily communicate with the client. For this specific widget, the process involves initializing the app widget and, upon receiving the tool result, updating the anime state. This ensures the widget always displays the most current data from the server tool call.
The useApp hook offers various methods for host interaction. For instance, the widget includes a link that, when clicked, sends a ui/open-link message to the client, prompting the link to open in a separate window.
Widget HTML Entry Point
For each widget you create, you will also need to create an HTML entry point. This is so Vite can properly bundle your widget. For example, here is the entry point for our anime detail widget above:
<!doctype html>
<html lang="en">
  <head>
    <meta charset="UTF-8" />
    <meta name="viewport" content="width=device-width, initial-scale=1.0" />
    <title>Anime Detail Widget</title>
  </head>
  <body>
    <div id="root"></div>
    <script type="module" src="./anime-widget.tsx"></script>
  </body>
</html>
This entry file is what you give to the Vite build command so it knows what to bundle. Here's the build script for this widget:
"build": "INPUT=widgets/anime-detail-widget.html vite build --config vite.config.ts"Test your App with MCPJam
MCPJam is an open source testing platform for MCP servers, ChatGPT apps, and MCP Apps.
The MCPJam team built the first working client prototype that supports MCP Apps. MCPJam client follows the spec defined in SEP-1865 such as resource handling, tool calling, send follow up message, etc. We hope the client preview will help with accelerating the development of the MCP Apps SDK.
To start up the MCPJam inspector, it's a single npx command:
npx @mcpjam/inspector@latestHere's what the example app above looks like in MCPJam:
Deploy your MCP App
After developing your MCP App, you can use the Wrangler CLI to deploy it to Cloudflare! All you have to do is run:
npm run deployAnd follow the instructions to link your Cloudflare account. Just like that you can now share your link and MCP app with the world! We can't wait to see what you build.